DISCLAIMER: Do NOT use the name “Domain Expansion” or “Gojo” in your game, or it will probably get taken down for copyright issues! I am not responsible for any games taken down because of copyright issues!
Introduction
You’re probably wondering, “What is a domain expansion?” & “Who is Gojo?”
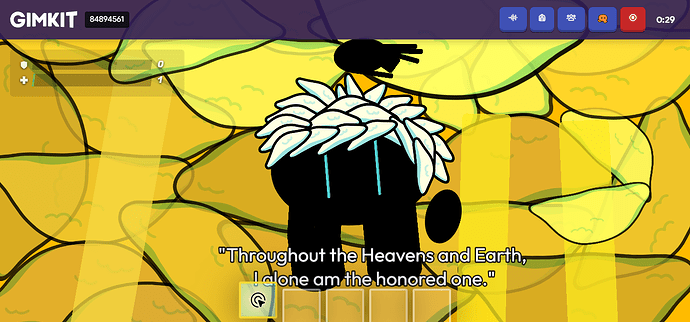
Well first of all, Gojo is someone from an anime called Jujitsu Kaisen (JJK), and he is really strong! Look him up on google because I don’t want this guide to get taken down. Gojo’s Domain Expansion is one of his best attacks that traps opponents in an infinite void and immobilizes them! The thing is, it’s just an illusion and is just a giant circular barrier that makes it look infinite! (I will take this gif down if it is copyright or if I have to)

That’s it for the intro! Time to make it in gimkit!
Materials
x1 Button Overlay
x5 Relays
x4 Wire Repeaters
x2 Speed Modifiers
x1 Barrier
Setup
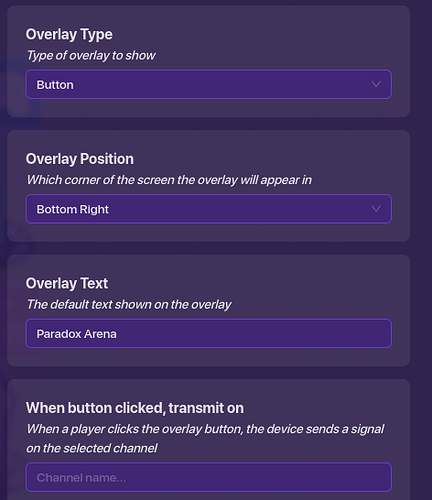
Step 1: Once you have your button overlay, name it something like, “Paradox Arena” or “Infinite Void” also change both of the scopes to player
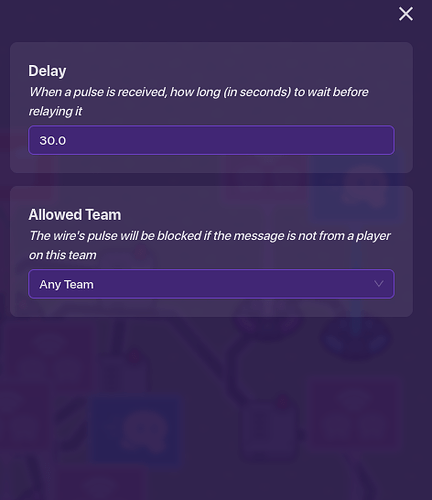
Step 2: Place down a wire repeater with a delay of however long you want the cooldown to be
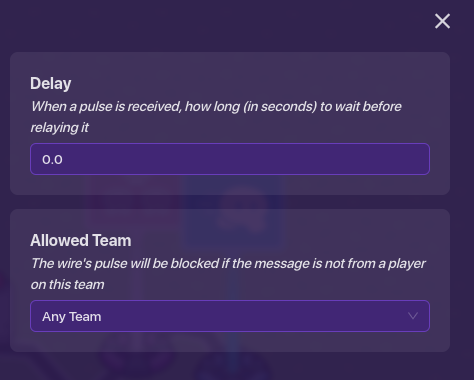
Step 3: Place down another wire repeater with the delay of 0
Step 4: Place down a relay with the setting to all other players and copy it 4 times
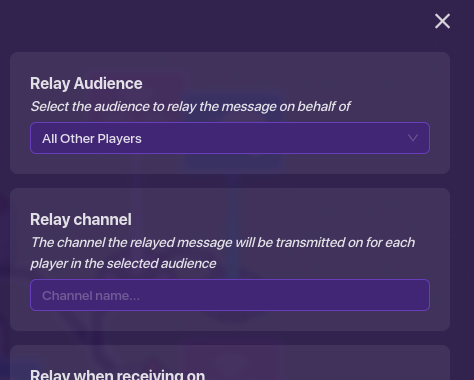
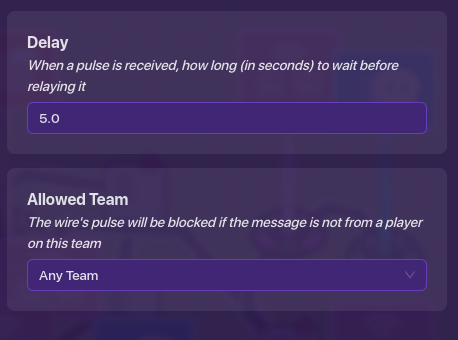
Step 5: Place down a wire repeater and set the delay to however you want the domain to last (5 preferred)
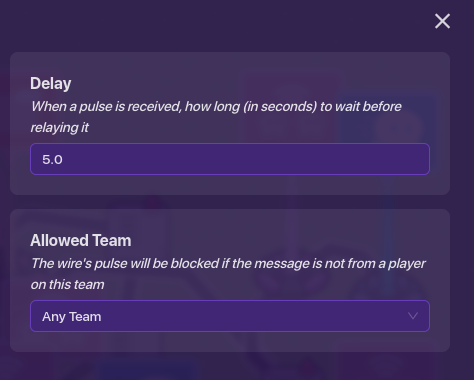
Step 6: Place down the final repeater and make the delay what you made it in step 5
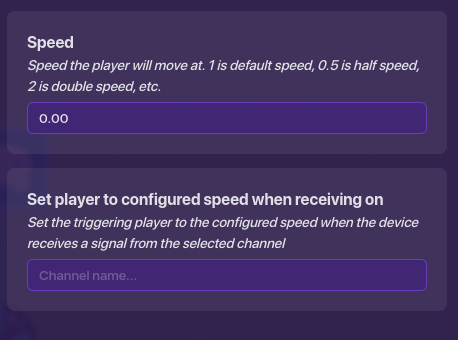
Step 7: Place down a speed modifier with the speed of 0
Step 8: Place down a speed modifier with the speed of 1
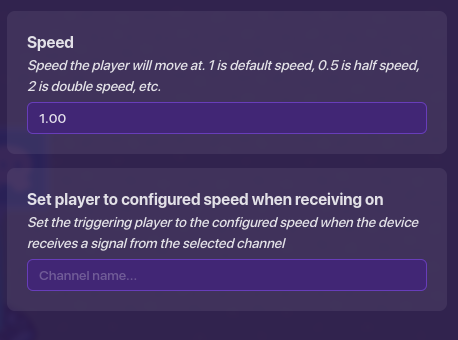
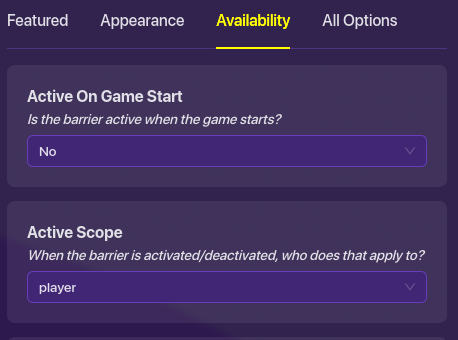
Step 9: Place down a big purple circular barrier with a scope of player on to your entire map
Step 10: Wire your button to the wire repeater with a delay of 0 with these wires
overlay to WR
Button Pressed --> Repeat Wire Pulse & Wire Repeater to the button overlay Pulse Received --> Hide OverlayStep 11: Wire your button overlay to your cooldown wire repeater with the wires:
Button Pressed --> Repeat Wire Pulse & WR to Button Overlay Pulse Received --> Show OverlayStep 12: Now wire the button overlay to a relay with
Button Pressed --> Trigger RelayStep 13: Wire the relay to the Speed Mod with 0
Relay Triggered --> Set Player To Configured SpeedStep 14: Wire the button overlay to a different relay with the wires
Button Pressed --> Trigger RelayStep 15: Wire the relay to the barrier with the wires
Relay Triggered --> Activate BarrierStep 16: Wire the relay to the wr from step 5,
Relay Triggered --> Repeat Wire PulseStep 17: Wire the wr to a new relay,
Repeater Receives Pulse --> Trigger RelayStep 18: Wire the relay to the barrier,
Relay Triggered --> Deactivate BarrierStep 19: Wire the overlay to the step 6 wr with the wires
Button Pressed --> Repeat Wire PulseStep 20: Wire the wr to a different relay with the wires
Repeater Receives Pulse --> Trigger RelayStep 21: Wire the trigger to the Speed Mod with the speed of 1 with the wires of
Relay Triggered --> Set Player To Configured SpeedWhew! 21 steps and you’re done! This guide took me like an hour to make!
How easy is this guide?
- 0/10 or

- 1/10 or

- 2/10 or

- 3/10 or

- 4/10 or

- 5/10 or

- 6/10 or

- 7/10 or

- 8/10 or

- 9/10 or

- 10/10 or

- 11/10 or

