This guide will show you how to make an easy to use telemetry system. Most of you probably don’t know what telemetry is, and that’s ok! Telemetry is data output from something. In this case it’s your game. Telemetry is very useful in bug-fixing, and having a system that’s quick to use can save you lots of time! Let’s dive into the details of use first.
Let me clarify that building the system isn’t easy, but using the system after you build it is easy.
If you want to add a property to your telemetry, simply put another property down that contains your property’s name. The name of the new property needs to be something specific for the system to work, but we’ll get to that later. And that’s it to add a property into the telemetry feed!
Now let’s get into how to make this system.
First, we need a system to count just how many properties we want to add. First, place a lifecycle down and wire it to a trigger. Make the trigger receive on “countTelProp”. Make a property called “numTelProp”. Its scope is global, and it’s a number property. Put these blocks in the trigger (you can ignore the activity feed item if you want. It doesn’t really matter):
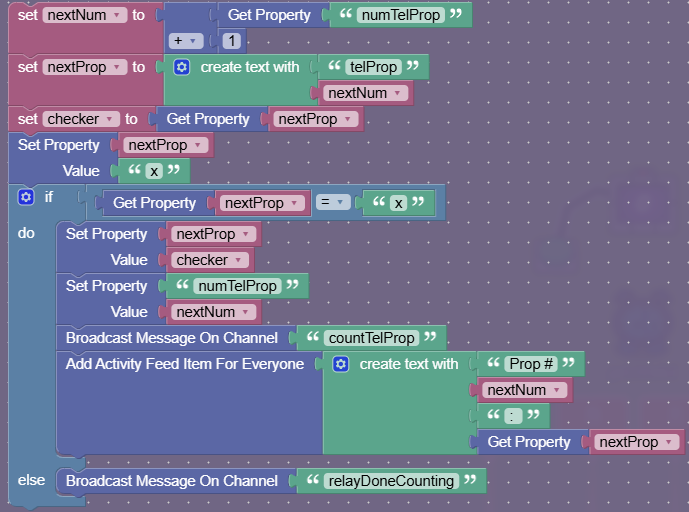
That should count the number of properties! Now, we need to update the overlay. To do this, we’ll use a tick based system. Make a relay receive on “relayDoneCounting” and broadcast to all players on “doneCounting”. Make another trigger receive on “doneCounting” and trigger another trigger by wire. Make this new trigger receive on “updateTeleProp” and add these blocks:
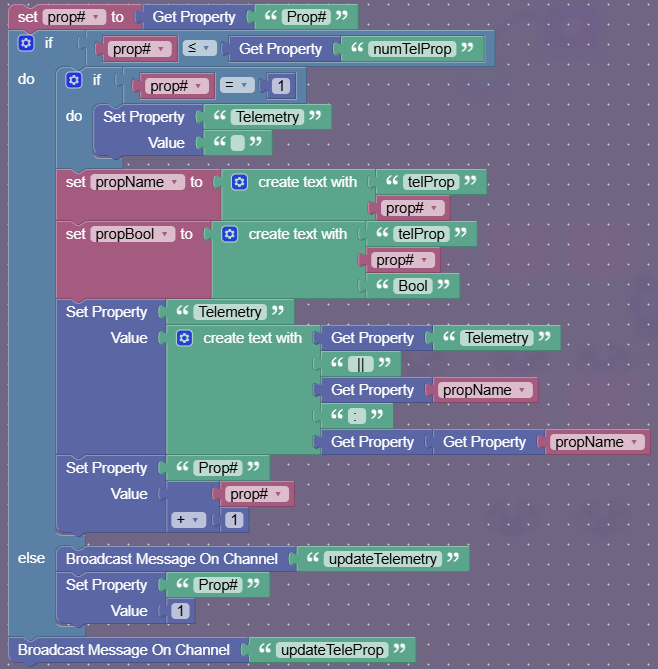
Now, add an overlay, with the content scope being player. Add blocks in this overlay when receiving on “updateTelemetry”. Add these blocks in it:
![]()
And you’re done!
Now, to use this system, I’ll tell you the property’s name from earlier:
![]()
You need to add a property of the form “telProp#”, were # is the number of that property if you were counting the properties.
If you have any questions about how this works, ask it in the comments!
Showcase link: