Hey there! This is my guide for you to make your own zen garden, complete with sand patterns and other decor.
Sand Terrain Patterns
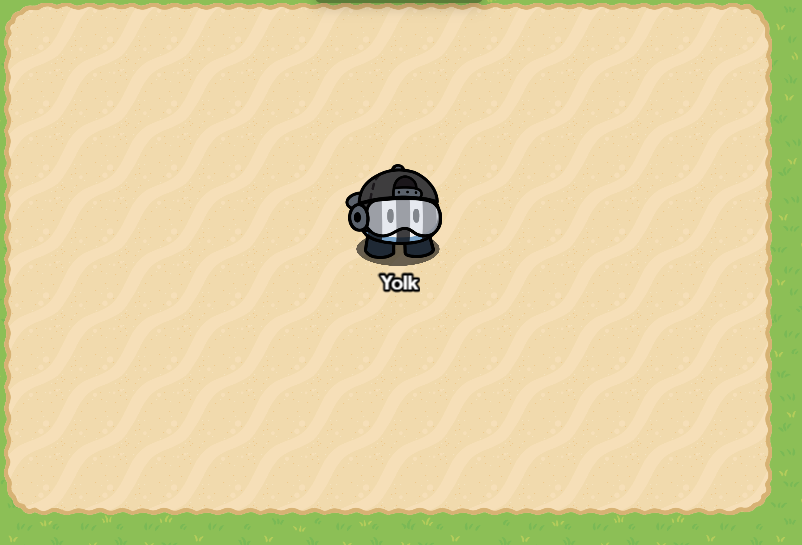
When making a zen garden, the main component you are going to need is a pattern of raked lines in the sand. To make this pattern, I recommend using terrain layering.
First, lay out the area of the garden with sand terrain. Be sure to set the layering of the sand to 3 - the middle layer. For this example, I will be using a 8 x 12 rectangle, but you can use any shape or size your heart desires.
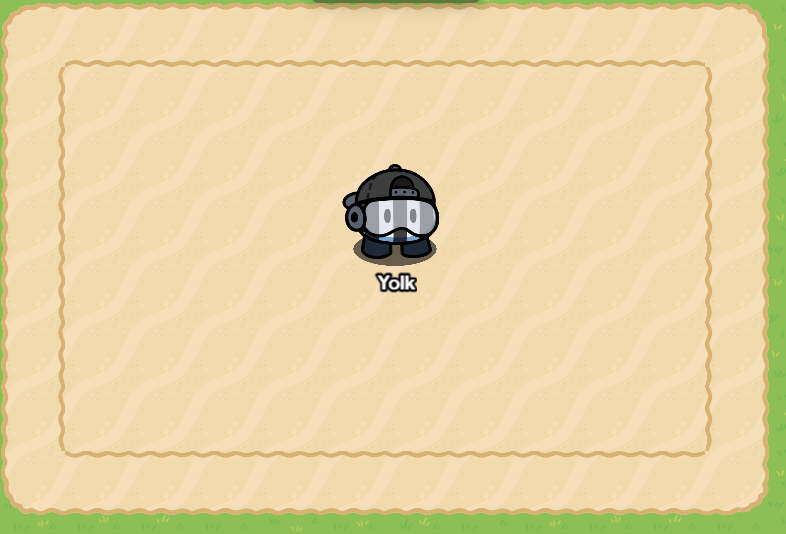
Next, add a ring of sand with a thickness of 1 around the perimeter of the rectangle. To make this ring show, be sure the set the layering of the sand to 4 - the upper layer.
Make another ring, except make it smaller, being sure to leave a gap with a thickness of 1 between the two rings. This step can be repeated for however big you garden is.
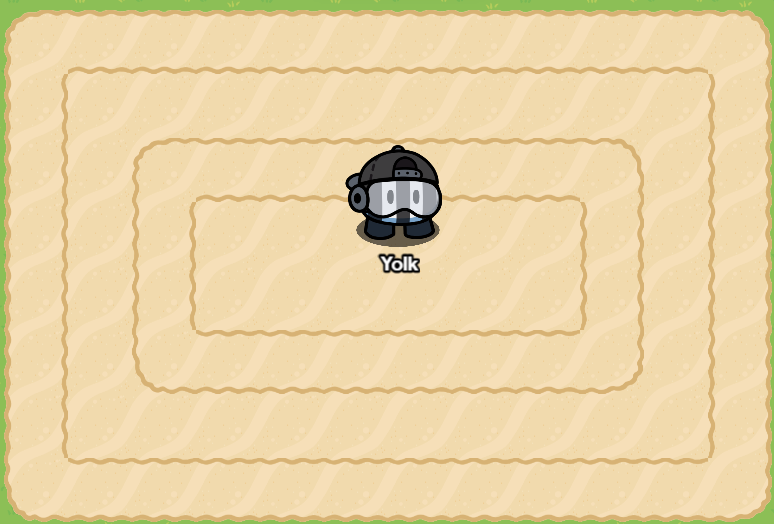
Finally, fill in the gaps between the rings with sand, this time in layer 5 - the top layer. Feel free to also fill in the center of the garden.

And that’s all for the sand patterning. If you want to add a little extra detail, you can add a rake prop and a sentry to your garden to keep your pattern in line.
Bonsai Tree
Needed props: 1 Ceramic plate (Tint 167:118:73), 1 Evil potted plant (No tint), 1 Dirt (Tint 96:92:92), 2 groundbreaking plants (Tint 143:90:0), and a LOT of leaf props (Tinted to your preference)
First, place the ceramic plate on top of the evil potted plant so that the plant growing in the pot is covered.

Next, place the dirt on top of the plate and use layering to make in show on top of it.
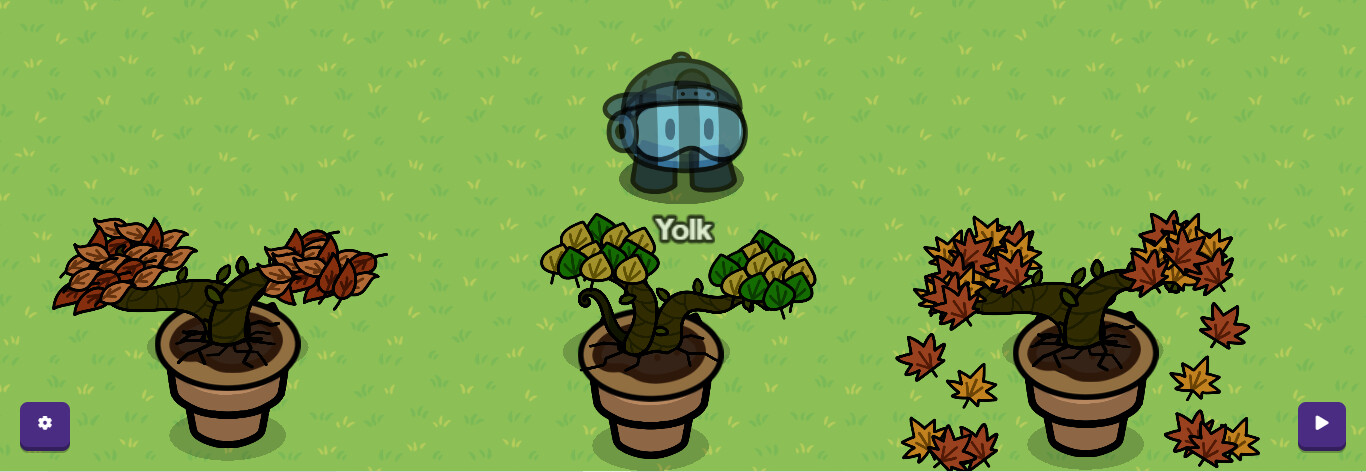
After that, align the groundbreaking plants in the dirt so that it looks as if they come from one stem, and layer them so they show on top of the dirt. Any combination of groundbreaking plants can be used to create your personalized tree, but I recommend the two shown in the picture below.
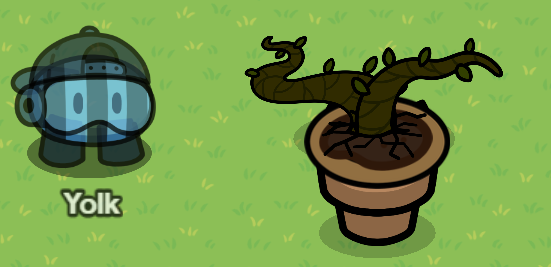
Finally, copy multiple leaf props to cover the tops of the groundbreaking plants. You can use any design of leaf and any color tint to make a tree that fits the image of its surroundings, or one that really pops. A few of my designs are shown below.
Outdoor Lantern
Props needed: 1 medieval lantern, 2 ceramic plates (Tinted 122:122:122), 2 horseshoes (Tinted 122:122:122), and 2 anvils
First, flip one anvil horizontally and place the two anvils on top of each other, each pointing in a different direction. Place an enlarged ceramic plate on top of the two anvils.
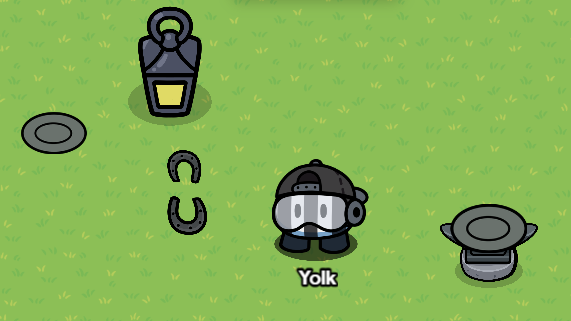
Next, place the medieval lantern on top of the ceramic plate and create a loop out of the horseshoes.
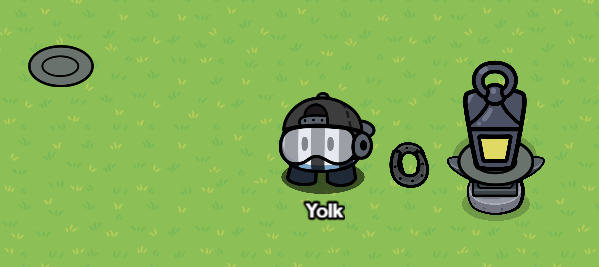
Finally, place the horseshoes on top of the yellow part of the lantern and move the second ceramic plate onto the top of the lantern.
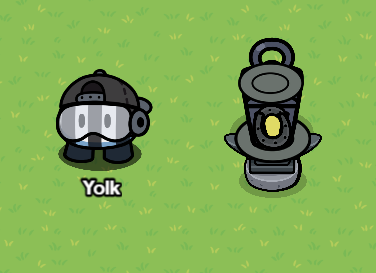
And that’s all for the outdoor lantern.
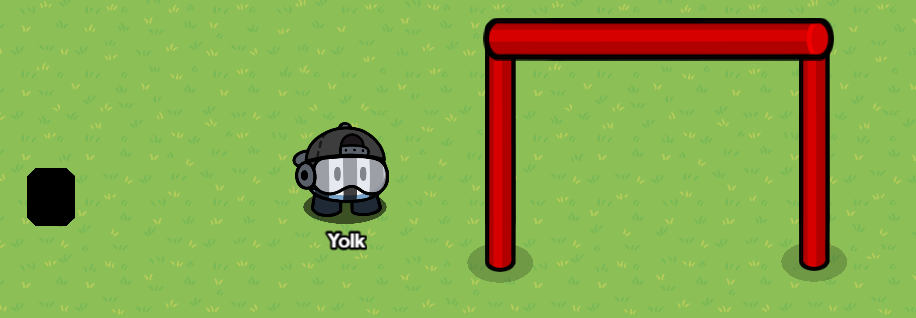
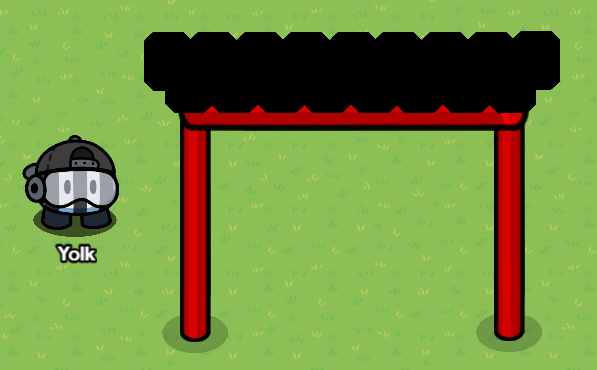
Pagoda-style Archway
This archway can be used as a cool entrance to your garden. It can also be used as a passage between areas all around your map.
Props needed: 3 metal poles (Tinted 255:0:0) and a lot of space containers (Tinted 0:0:0)
First, place 2 poles however far apart you want your archway to be.
Then, depending on how wide the archway is, expand or shrink the third pole to span across the two other poles. Be sure to turn off collision and shadows on this pole, and to place it in the above layer.
After that, copy the black space container and arrange the copies so that they form a row as long as the top metal pole. Be sure to turn off collision on the space containers too, and move them above the top pole.
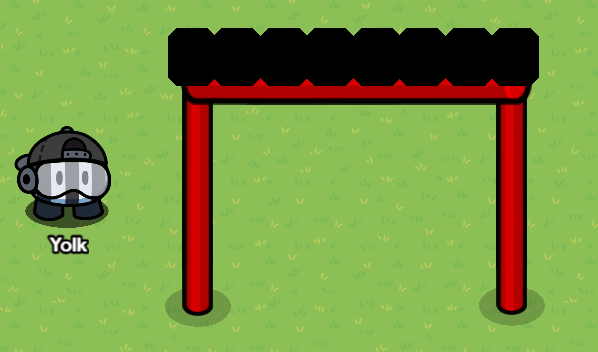
Finally, copy the row of space containers and add one more onto the side. Move this second row above the first one, centering it on the middle of the first row.
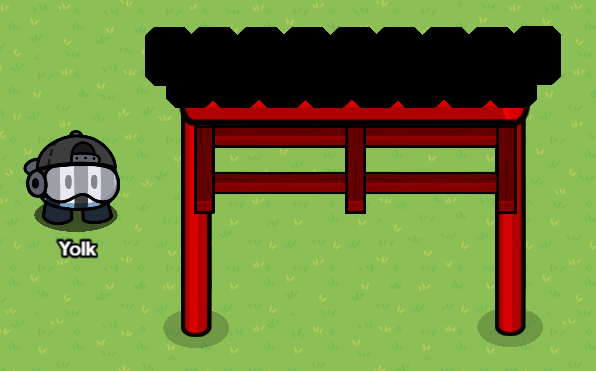
Optional
Use 2 empty shield racks (Tinted 255:0:0) to add extra detail to the arch. Be sure to turn off collision on these props too and move them to the above layer.
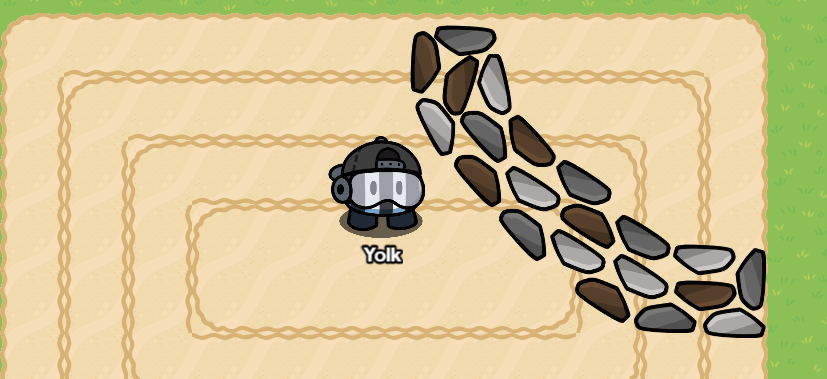
Rock Pathway
This design is really simple. The only prop needed is the rock prop. You can use a wide variety of tints and colors, but my favorite are no tint, 153:153:153, and 129:96:65.
To make it, just copy the rocks, rotating them to fill empty space. If you position them well, you can make curves and other forms of lines with these rocks.
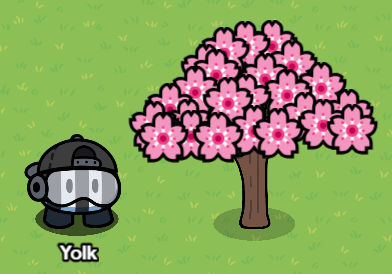
Cherry Blossom Tree
A tree like this can be one of the main features of any zen garden. This design takes advantage of the use of emojis in text devices. Like the rock path, this is a very simple design.
Needed props (and devices): The ![]() emoji can be found by copying and pasting into a text device. Other than the emoji, all you need is a snowy bare tree prop.
emoji can be found by copying and pasting into a text device. Other than the emoji, all you need is a snowy bare tree prop.
To make this tree, all you need to do is copy the ![]() emoji over the tree, making sure to layer the flowers above the tree and covering up the snow.
emoji over the tree, making sure to layer the flowers above the tree and covering up the snow.
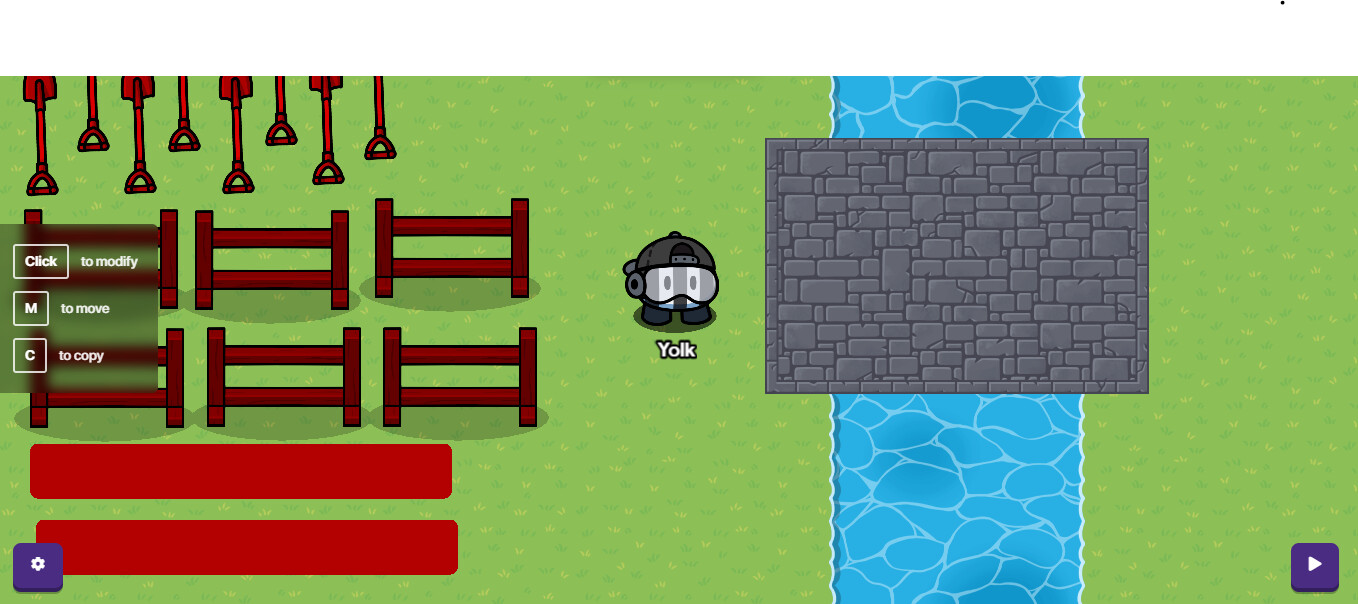
Pagoda-style Bridge
Similar to the archway, this bridge can be used to connect together areas anywhere on your map. It uses terrain layering to get a cleaner look.
Props (and devices) needed: Multiple shield displays (Tinted 255:0:0), Multiple metal shovels (Tinted 255:0:0), and two barriers (Colored 179:0:0)
First, make a river using water terrain. This river can be any width, but be sure to use terrain on layer 3 - the middle. Add a rectangle of any stony terrain across the river. For this example, I’ll be using gray dungeon terrain. put this terrain in layer 4 - the upper layer.
Next, use the empty shield displays to form a railing along the edges of the bridge. The number of empty shield displays you need matters on how long your bridge is.
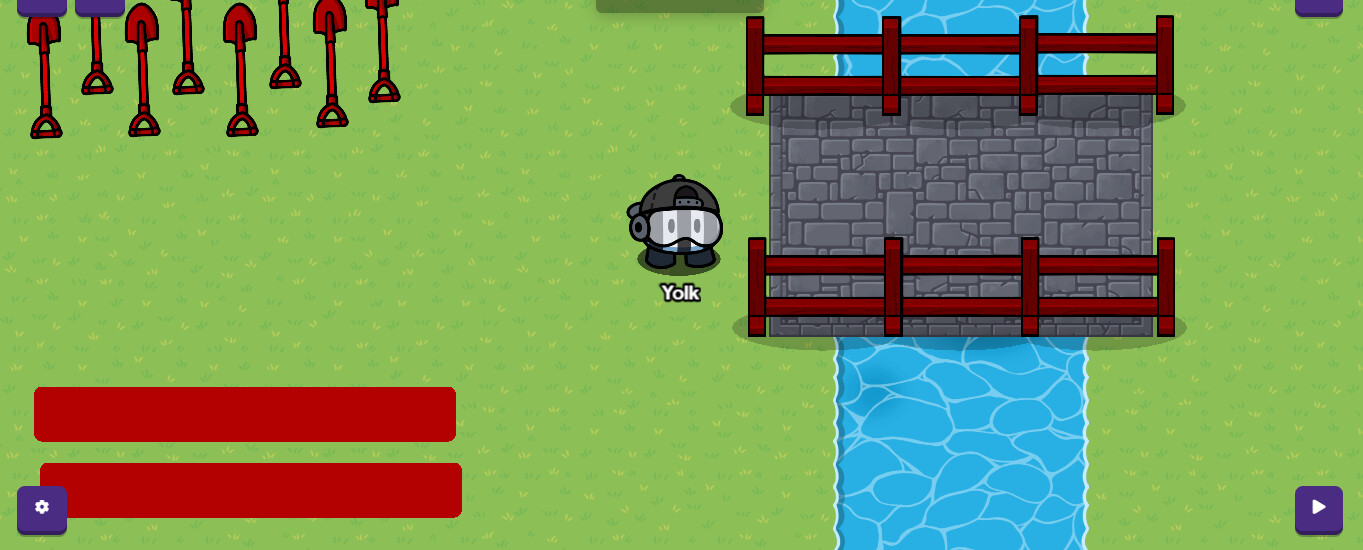
After that, add shovels under every post of your railing, layering the shovels under the empty shield displays.
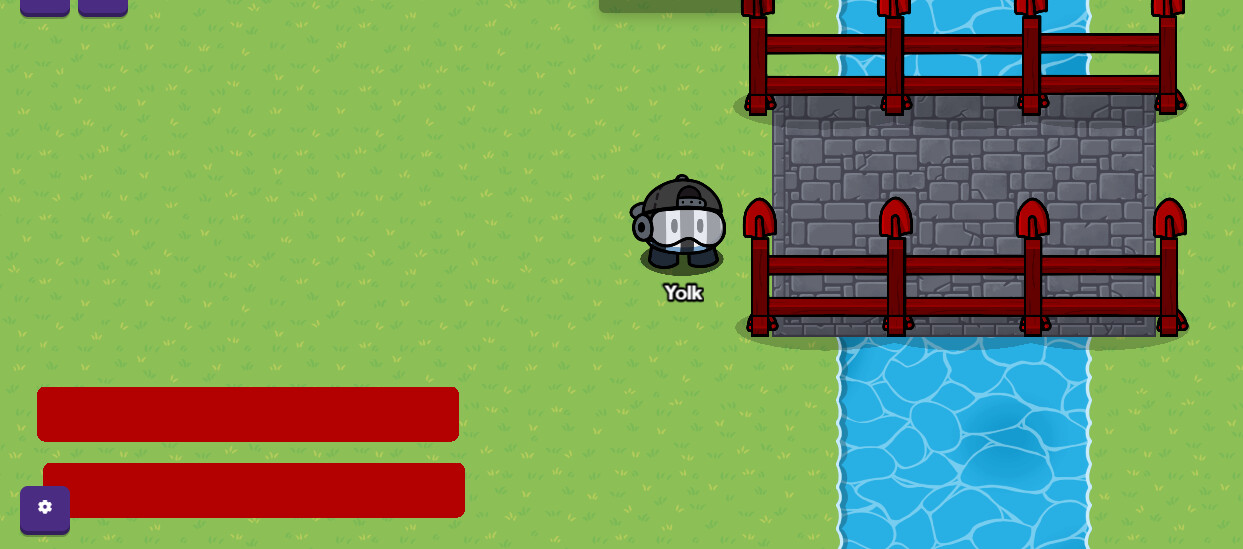
Finally, add the barriers under your railings, filling in the gap between the two horizontal beams.
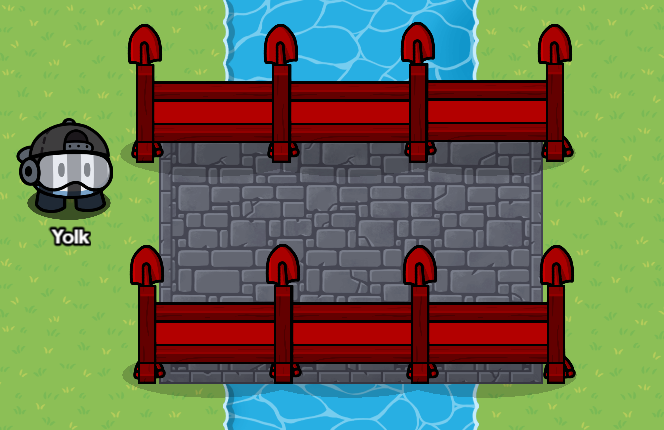
And that’s all for the pagoda-style bridge.
By Yolk