“Meters are cool.” - Albert Einstein
This is a tutorial on how to make a meter that shows a percent graphically. You could use this for a lot of things, like an ability cooldown, a loading bar, a battery meter for a FNAF game, a meter to show how much energy you have, or pretty much anything! (as long as anything is a number between 0 and 100 you want to show using a meter)
This is what you’ll get at the end of this guide:

If you want, you can also change the symbols used to make it look different.
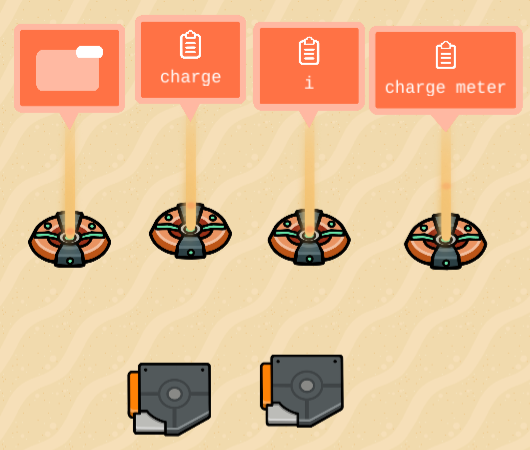
Step 1: Placing Devices
- Add a Game Overlay, and make sure it’s set to Text.
- Place 2 triggers.
- Add a text-based property to store the meter text.
- Make a number property for the percent you want to show, unless you already have it.
Reminder: this number should only ever be between 0 and 100. - Add another number based property, which is used for looping.
In my example, the text property is called ‘charge meter’, the property for the percent is ‘charge’, and the looping property is ‘i’.
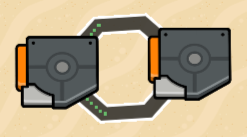
Step 2: Making the Trigger Loop
This loop is used to update the meter, so that it’s almost always accurate to the exact percentage.
- Set both of the triggers to have a delay of 0.1. You could have longer delays, but if they’re too high, the meter will be sluggish.
- Wire them both to each other. The wires should have ‘Triggered’ checked on the left, and ‘Trigger’ checked on the right.
- Set the triggers to both be invisible, and have the player collision setting off.
- Add something to trigger one of the triggers. For example, you could use a Lifecycle device set to Game Start.
- One of the triggers should transmit on a channel to update the meter. In my example, this channel is called ‘refresh charge meter’.
Step 3: Blocks!
Open your Game Overlay, and create a new block. Set the channel to the channel you previously set the trigger loop to transmit on.
To make the explanation simpler, I will be using the property names from Step 1.
For this step, there’s a lot of images. If you don’t want to follow the text steps or they’re too confusing, you can just copy the images.
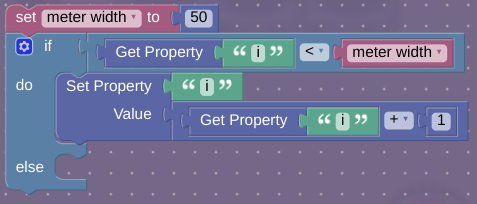
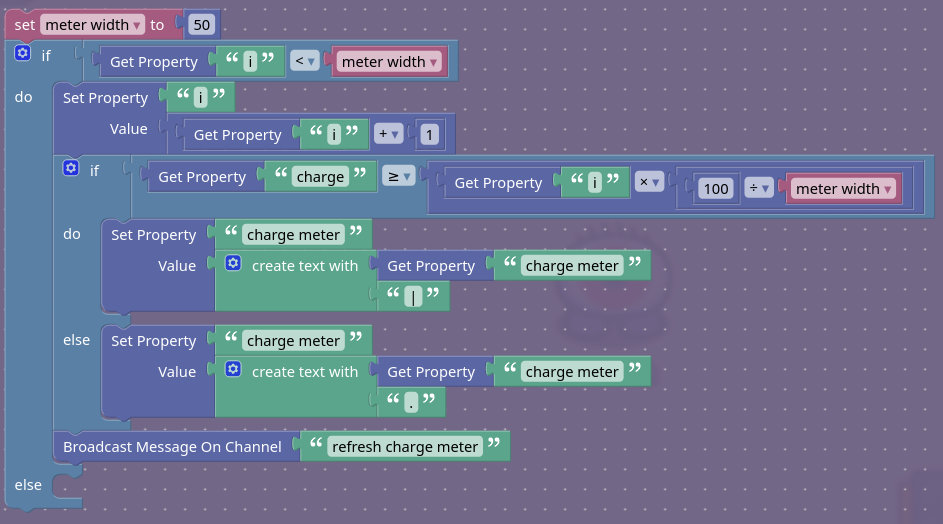
- Make a variable called ‘meter width’, and add a block to set it to a number. This variable determines how long the meter is. I used 50 in the example gif.
- Place an if block, click the settings gear, and add an else block.
- The if condition, which is just right of the word, should be [[Get Property(i)] < meter width].
- Inside of the if block, add a Set Property block, set the property to i, and set the value to [[Get Property i] + 1]
It should now look like this:
 \
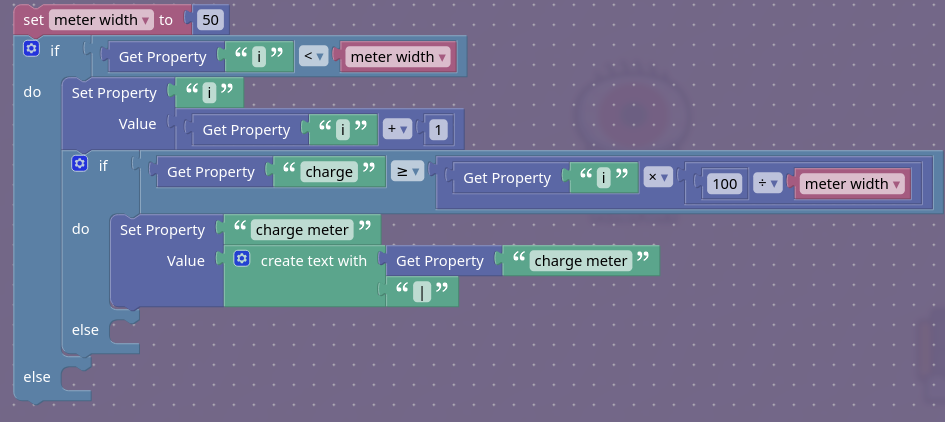
\ - Below the Set Property block(but not inside the else block), put another if block, and add an else block.
- Put a ≥ logic block into the new if block. On the left side, put Get Property charge, and on the right, put [Get Property i x[100 ÷ meter width]]
- Inside of ‘do’, add a Set Propety block, with the property being “charge meter”.
- Inside of ‘Value’, place a create text with block. On the top of the block, add a Get Property(charge meter) block, and on the bottom, just put a text block with the “|” symbol inside.
- Right click and duplicate the whole Set Property(charge meter) block, including the create text with block.
- Place this new block inside of ‘else’, and change the “|” into a “.”
- At the bottom of the ‘do’ in the original if block(what we’ve been working in for a while), add a broadcast block and set the channel to ‘refresh charge meter’.
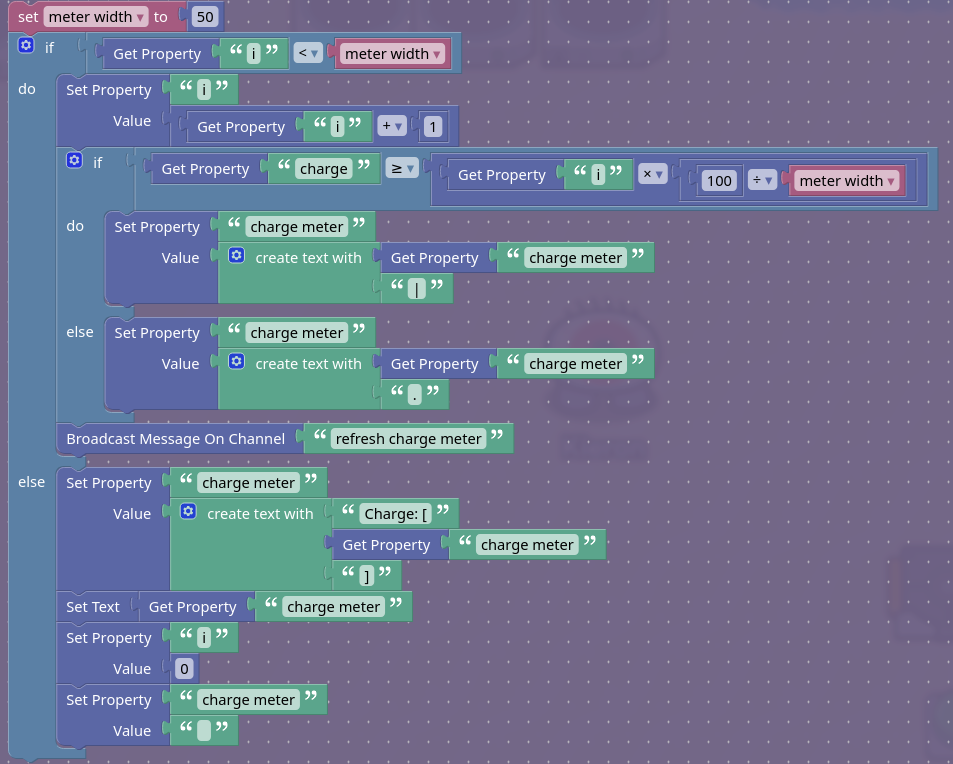
We’re finally done with the whole ‘do’ part of the original if block! From now on, we will be working in the ‘else’ part. - Add a set property block, with the property being ‘charge meter’.
- Inside of ‘value’, place a create text with block, and press the settings button to add another item.
- Set the first item to a text block that says “Charge: [”, but you can change “Charge” to anything else depending on what the meter is for. Set the second item to Get Property(charge meter), and the third to a text block with “]”.
- Below the set property block, add a set text block, and put get property(charge meter) inside of it.
- Add another set property block, with ‘i’ this time. Set the value to 0.
- Add one last set property block, with the property being, you (probably) guessed it, “charge meter”. Set the value to an empty text block, and you are now done!

Make something, such as a button wired to a counter set to update the ‘charge’ property, and try out your meter!
This is my first ever guide, so leave feedback in the comments if you think I should change anything.
- 0/10

- 1/10

- 2/10

- 3/10
- 4/10

- 5/10
- 6/10

- 7/10
- 8/10

- 9/10
- 10/10

- 11/10
