Most of use have seen the minecart prop in “Dig It Up” but it’s not in creative yet. And sadly Josh said he does not know when gimkit will release the props from “Dig It Up” to creative.

So while we wait, I decided to make my own! One that if you set a teleporter behind it you can make a rideable animation cart.Here is a list of materials you will need and the steps to make the minecart.
Material List:
- Text(Device) x6
- Circular Shield x4
- Barrier(Device) x7
- Dark Wood Sign x4
- Dark Wood Pole x2
- Medieval Lantern x1
Steps:
-
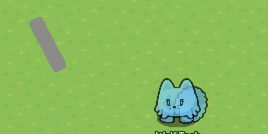
Step 1:
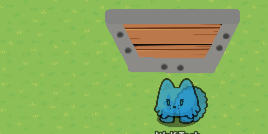
Make a barrier with the RGB of (140, 139, 135) and tilt the barrier Northwest to Southeast.
-
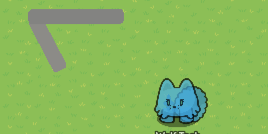
Step 2:
Make a barrier with an RGB of (131, 131, 129) and have it on-top of the first barrier but facing West to East.
-
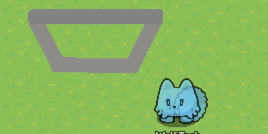
Step 3:
Add one more barrier in the same RGB as the first barrier in the direction Northeast to SouthWest. And add a barrier of the same RGB connecting the right and left side barriers.
-
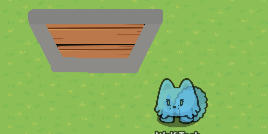
Step 4:
Place two wooden signs, one normal sized one shrunken, under the barriers.
-
Step 5:
Next place two text boxes (size 11) with a black circle emoji on each of the light grey barriers. Make sure to place them evenly apart from each other and the end of the barrier.
-
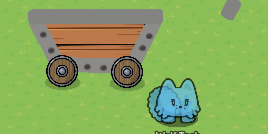
Step 6:
Now place the two circular shields on the points where the light grey barriers meet on the bottom.
-
Step 7:
Now copy the same RBG as the dark grey barrier and shrink the barrier and tilt it from Northeast to southwest. Repeat this step twice.
-
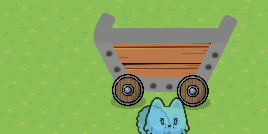
Step 8:
Now place a barrier the same size, and RGB as the original dark grey barrier. And add two more dark wooden signs in-between the barriers. Tint them(216, 212, 212). This is to make it look 3D.

-
Step 9:
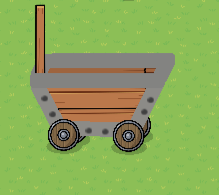
And now you add the last two circular shields under all of the barriers. The simplest way to do this move them under the “below” section in layers.
Optional Steps
-
Step 10:
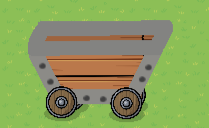
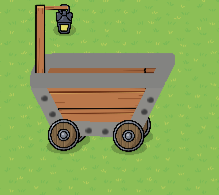
This is to add a lamp to your cart because sometimes you might be going through a cave and it will fit the aesthetics well. So first add a wooden pole(medium thickness) to the back of the cart
-
Step 11:
Now copy a paste that pole. Turn it from West to East and shrink it to be 3/4 of the original size. Then place a Medieval lantern(shrunken) on the end of the pole.
And now you are done! I personaly think it turned out good. But this is as well as it can get to be smooth for animation and simple and easy to make. So i hope yall like it. Let me know if i forgot anything or if you have a suggestion.
Keep On being Creative,