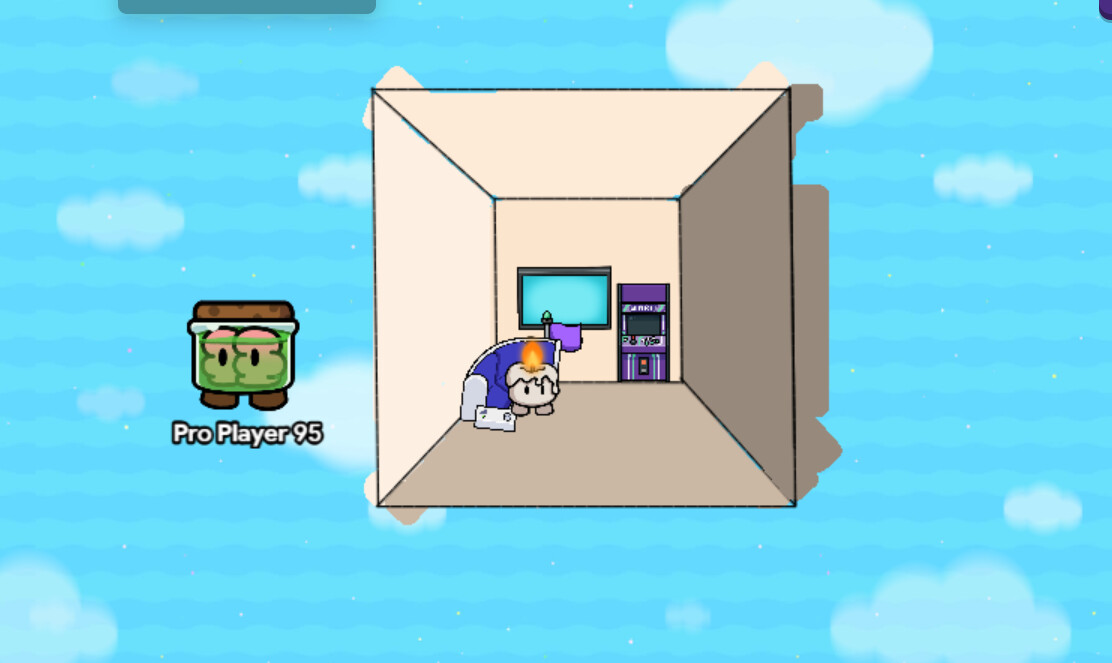
A 3D Mini Room is a small decorative virtual space designed to look three dimensional. By carefully placing walls floors and objects you can create a room that feels more realistic and detailed. These mini rooms can be used for decoration storytelling or even as part of a larger game.
So let’s get started!
Materials
12x Text
Barrier
Props (Whatever you want for decoration)
Step. 1
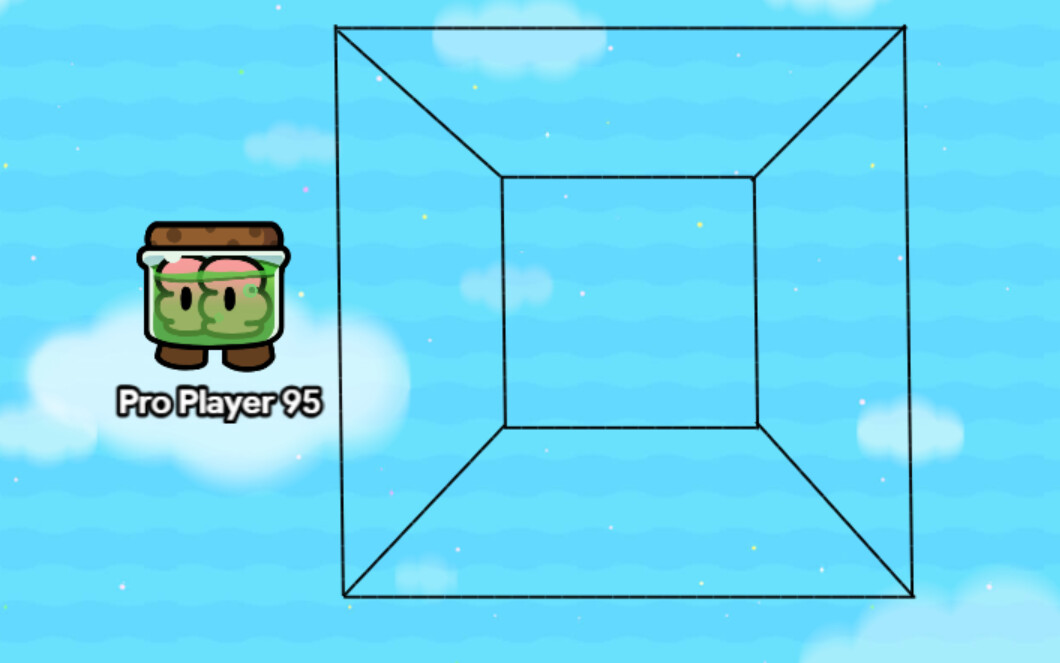
Make a Structure like square inside a square with Text device. Change the Text’s Font to Roboto and Set the text to display _________. All text should be moved to Primary layer!
You can chose whatever size you want!
It is too simple to make you don’t even need to know the “angles” since square have 90 degree angle and just match both corners of the squares!
That’s It.
Anyways, this is a good guide overall.
I’m not rating it because I’m too lazy to pull out my calculator and figure out what the mean of my ratings are like a math nerd and judge I’m just tired.
While both use 3D illusion techniques this one focuses on building interior spaces with walls, floors, and decorations. This is guide about Interior not (exterior slope).
this is an awesome guide! however, there’s just one angle. while this is a non-necessary thing, it would absolutely help to give it multiple perspectives. I can give you instructions you can copy and paste into the guide if you want
Did you even bother to read both guides? Just because the titles are different doesn’t mean they aren’t essentially the same thing, you can’t assume they’re completely separate just based on a name. Toxic’s guide is not just about 3D Slope, it’s about how to make 3D objects based on different barrier and text layering.
I’m still trying to understand what they were saying… Did they mean the picture you sent looked like the end of a slope? Or did they mean this guide is about slopes and not rooms? Did they mean what you explained? I’m still confuzzled.
@ProPlayer95 If you were to a huge plus side on the 3d mini room it would kinda look like your looking through somebody’s window .
Heres a bad example of what I mean that I made on google slides.
once you have the point and the square down, you’ll want to make 4 more text boxes (of the lines) and orient them to roughly connect the dot to the corners of the square
now that you have the perspective lines down, place 4 more barriers in a smaller square around where you want the room to end (make sure the corners line up with the perspective lines)
remember: the smaller the square, the farther the back of the room is
step 5
now all you need to do with the lines is delete the POR and resize any lines necessary. the back of the room needs to be resized if it overlaps with the walls and the perspective lines need to start at the corners of the larger square and end at the corners of the smaller square
and, you’re done with the perspective version! thanks for reading!
feel free to copy and paste this into your guide, this is just a suggestion, however, I put the full work into it, I just didn’t add the props and decor bc I’m lazy
Wait, i haven´t tried this yet but is it really possible to walk on barriers? if so, i feel upid, if not… i still feel upid. Now thinking about it, you probably can, but I can’t try it because our school blocked us from signing into gimkit