I looked at some post for help and they talked about fixing the lights after the blackout sabotage, and I looked and no one has done this one yet. So, here is my version of the fix lights task in Among Us!
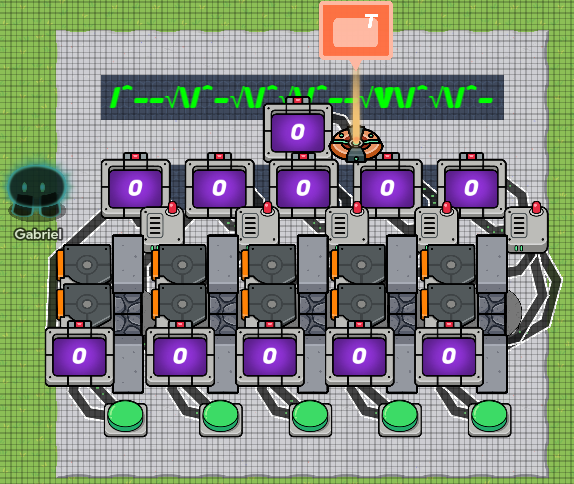
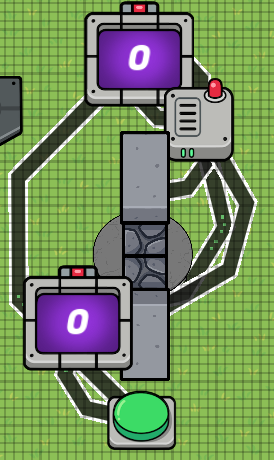
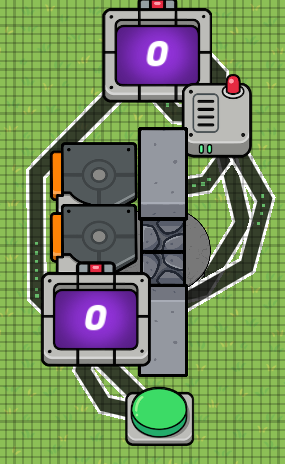
The Fix Lights task in Map editing mode

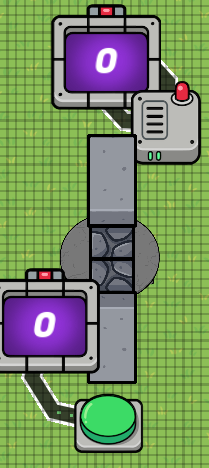
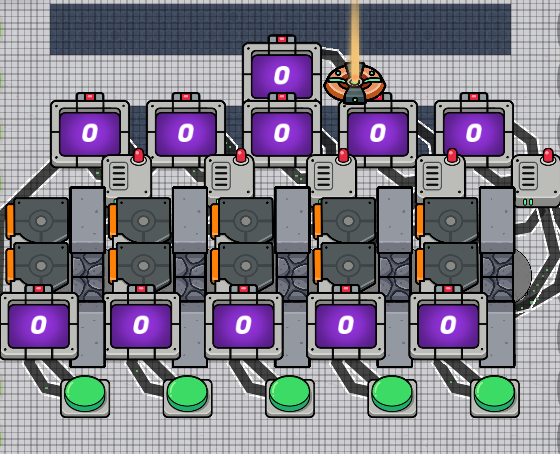
The Fix Lights task in-game
Materials Needed:
- 56 Wires (I think still a PB for me personally)
- 11 Counters
- 10 Dark Grey Stone Barriers (Vertical)
- 10 Triggers
- 5 Wire Repeaters
- 5 Buttons
- 5 Tables
- 1 Pop Up Device
- 1 Text Device
- Terrain (Basketball Court, Lab Floor Blue)
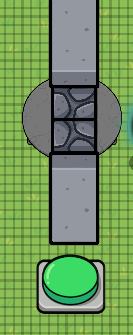
Step 1: Set Up Levers
Get out a stone barrier, put it on the below player layer, and change the availability to either-or, so it can be a more diverse sequence. Mine is Up, Up, Down, Up, Down, as seen in the in-game picture. For this guide though, we’ll make it not available at the start of the game. Now change the size so that it’s about this tall when compared to the 64 grid snap grid:

NOTE: It’s best to have the grid snap on 8 when moving things into position so things can line up better
Now, get a table (White circular one); change the tint so that the rgb is 133,133,133; put it under the stone barriers; and line it up so that the stone barrier is touching the halfway down point. Copy the stone barrier, change the availability to the OPPOSITE of the first stone barrier, use snap angles to rotate it upside down, and put it on the table so t’s touching the halfway UP point.

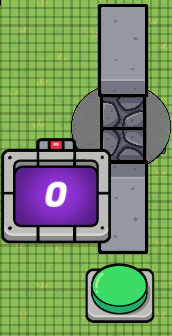
Step 2: Button and First Counter
Get a button, change the message to “Lever 1” and the interaction time to instant, and place it under the lever/switch like so:

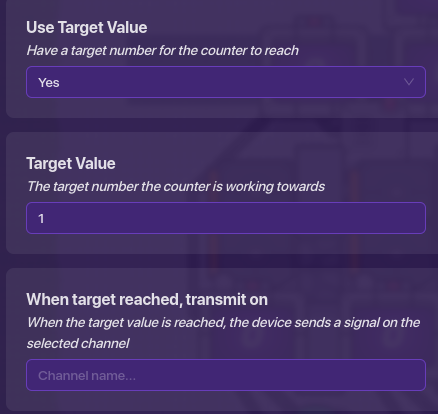
Now get a counter, set to not visible in-game, and put a target number and set it to 1. You can put this counter on the left side of the switch towards the bottom. Connect a wire from the button to the counter saying “Button pressed → Increment counter”.

Step 3: 2nd Counter w/ Wire repeater
Get out a second counter (preferably just copy the first one) and set the target to 2. Put it above the switch. Get a wire repeater and without changing anything, put it on the bottom right of the counter. Connect the two together with wires that say “Target reached → run wire pulse” and “Wire pulse triggered → reset counter”.

MAKE SURE to put it 3 pixels above the switch, this will give you a reference on where to position the lever in terms of the counter!
Connect the button to the second counter with it saying “Pressed → Increment Counter”. Connect the w repeater to the 1st counter saying “receives pulse → reset counter”. Connect the w repeater to the stone barrier that is not available at the start of the game (I.E. the top one), with the wire saying “Wire pulse received → show prop”. Connect the w repeater to the OTHER stone barrier (I.E. the bottom one) now, and say “wire pulse → hide prop”.
Step 4: Triggers and, Yes, Even More Counters
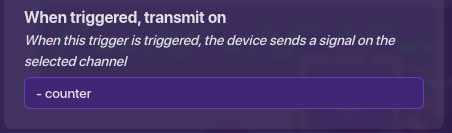
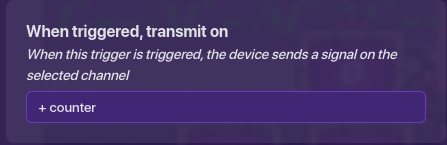
Get two triggers, change their configuration to NOT trigger when stepped on, trigger delay to 0.1, and not visible in-game. Set the channel for one of them for when it’s triggered to “- counter”, and set it for “+ counter” for the 2nd trigger. Place them like so with the -counter trigger on top, and + counter trigger on bottom.
Up to now, you’ve probably followed this guide exactly, which means that the sequence is the same, but make sure to change up the sequence of levers, like mine in the in-game picture at the top. In the case that the goal of the switch is to flip the switch to the top position, like this guide is, wire the top barrier to the + counter trigger, saying “Prop shown → trigger”. Wire the other barrier, the bottom one, to the - counter trigger, saying “Prop shown → trigger”. In the other case, where the goal is to switch the lever DOWN, you just flip flop them so the top barrier to the - trigger, and the bottom barrier to the + trigger.
*Also there isn’t an easy way to show this, but bare with me.

1 is for on, or the ending position, 0 is for off, the starting position
Step 5: Ctrl+C, Ctrl+V, Rewire
You’re done with one of the levers, good job! Now copy and paste all of it 4 more times, changing the button names to lever 2, lever 3, etc. and put down a 11 long, 10 tall rectangle with basketball court floor on the lower layer, layer 2 I believe? Make slits from the 2 column right, 2 row down, to the 10th column, 2nd row down and also another slit two spaces below that one, and fill them with lab blue flooring. Now place these copies side-by-side and make it match this layout:

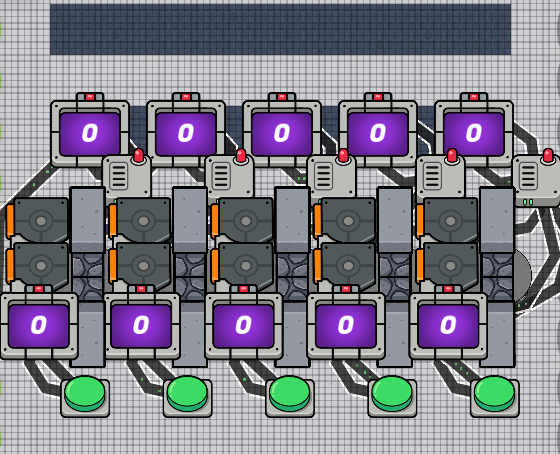
The counters should be 3 pixels apart, and lined up with the edges of the bottom screen. The layout is weird, so the w repeaters can be put basically anywhere.
Step 6: One Counter to Rule Them All (and text and pop up)
Copy one of the top counters, change the target to 5, make it not visible, and put it in the middle of the counters and in between both computer screens. Place a Pop Up device next to it, and connect them with it saying “Target reached → open Pop Up”.
For the pop up, make it a modal, change header text to “Task Completed!” (Looking back I know it doesn’t say task completed but it’s just there if you wanted to do it. ![]() ) Sent font to Rubik, player scope to player, and set the tint to full green: rgb=0,255,0. Lastly, Set the call to action button to just “close”.
) Sent font to Rubik, player scope to player, and set the tint to full green: rgb=0,255,0. Lastly, Set the call to action button to just “close”.
For the text, set the font size to 40, set font to Titan One, font color to full green, and set the text to be, as an example, “/^–√/^-√/^√/^–√V/^√/^-”. Afterwards, place it so that it lines up with the top computer screen.
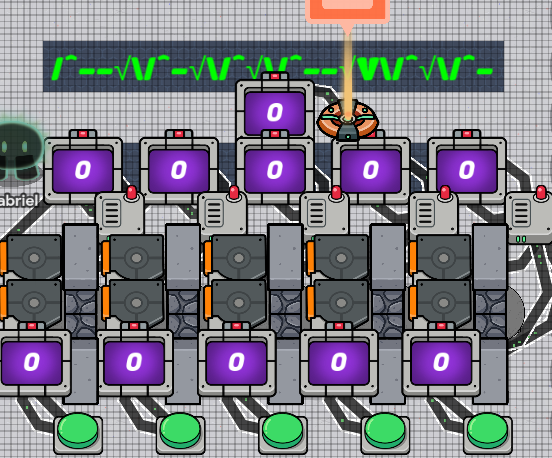
I know that the symbols don’t line up well, but I tried -_-
That is it for the main thing, other people will probably have a good way of doing walls, teleporters, and that whole section of fun things, but I just wanted to show something that I’ve come up with. Put any questions you have in the comments, and I’ll try my best to reply to them fast. Have fun with this, change what you like/want, and see you later!
*P.S. I know I’m bad with putting the difficulty, it seems easy to me, but then there’s the binary calculator, so I need to fix it