All game modes in Gimkit Creative revolve around player interactions. Two of the most common ways to begin interactions and activate in game events are Buttons and Vending Machines. Vending Machines are highly useful, have several visual customizations and are able to be stylized to your gamemode pretty easily. However Buttons offer no visual customization and while they might look good for certain game modes others, like those with a purple theme, might have conflicting colors and have poor synergy. This method of creating custom buttons will fix several topics such as these. Today I intend to show you one way to create your own customizable buttons in GKC.
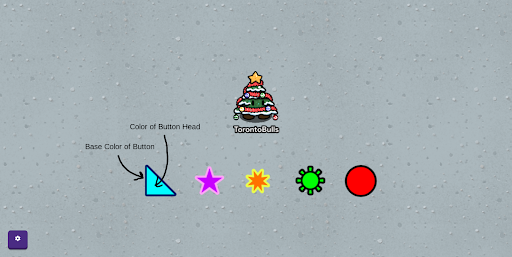
First you are going to want to choose the desired shape of your button. We are going to use symbols and text boxes to create this type of button. You can find thousands of symbols on https://coolsymbol.com/ which you can use for your button.
*IMPORTANT* Make sure this is a symbol not an emoji. Emoji’s cannot be recolored and for some reason a border, which is necessary for this button, cannot be applied in GKC. To check if your desired button is a symbol, paste it into a document (google or word) and change the text color. If it does change colors then you will be able to use it to create a custom button.
Step 1 - The Face of the Button
Create a text box and paste your symbol into it. Then change the color to whatever you desire. Then add stroke width around the text. If you are making a standard 1 by 1 button I would recommend a stroke width of 10. Make sure to change this stroke color to the base color of your button.
*NOTE* If you want only the player that hits the button to see the animation change the scope to player
Step 2 - The Base of the Button
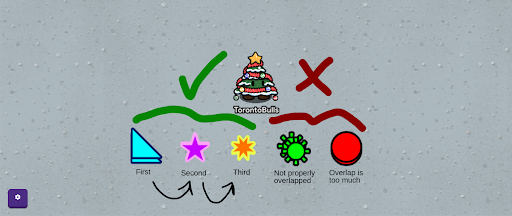
First) Take the face of the button you created in step one and duplicate it.
Second) Turn grid snap off and position it slightly under the button face. *TIP* If you hold h while moving it will lock the movement to only the vertical axis. This has to be done precisely to make the button look realistically 3D especially with circles.
Third) Once you have this done move it behind the original using layers
Step 3 - Making the Button Work
- Get the button you want to be activated. Change the visible in game setting to off along with the “this item has collision” setting.
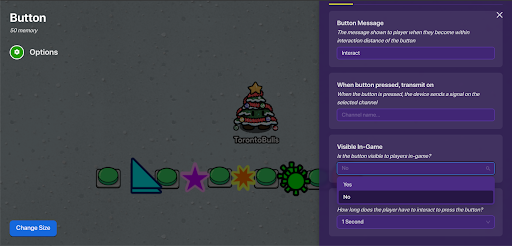
- Change the size of the button to allow the player to interact with it from all around our button. Now position it under the center of our button
Now we are going to make the button have an animation. You can do this either through wires or channels. Personally I would recommend channels as it will be a lot cleaner channels can activate multiple things at once whereas wires can only do one
The Wrong Wires Way
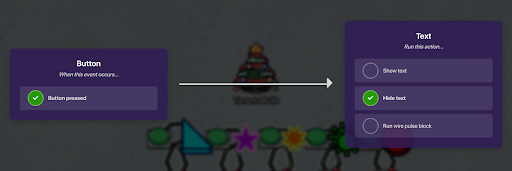
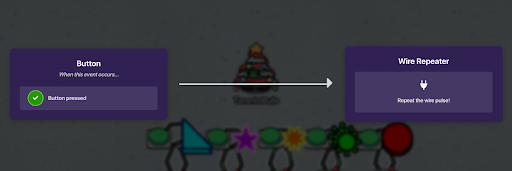
- Go to your button. Create a wire from it the the face of the button. Check when button pressed → hide text. TIP Press Z to create a wire without opening the menu.
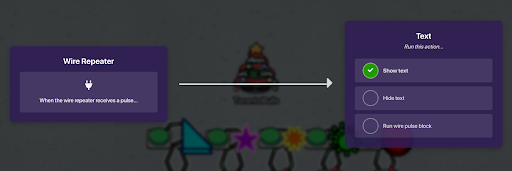
- Now wire the button to a wire repeater. Set the wire repeater delay to your desired delay between button presses. I would recommend half a second because text takes a while to disappear and reappear and if sequenced too fast the button will not appear as if it is being pressed.
- Now create a wire from the wire repeater to the button face. Select show text.
After this you should be done and ready to test!
The Correct Channels Ways
-
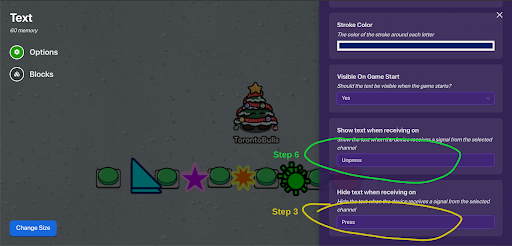
Go to your button and get the channel it broadcasts on when interacted with. Keep this in mind and then select the face of our button and go to all options. Under the “hide text when receiving on” prompt , put the channel from the button. This means the button face will deactivate when the button is pressed, since an identical copy is below it, the button face looks like it’s being pressed.
-
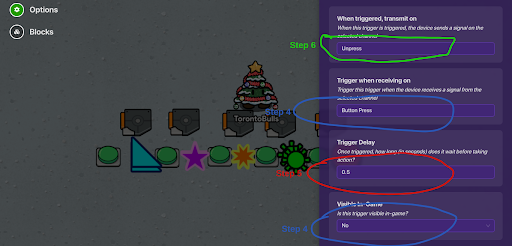
Now we need to reactivate that button face. Grab a trigger, turn visible in game, and trigger upon collision off and then go to channels. In trigger when receiving on put down the channel the the button broadcasts on (the one that makes the button face disappear) and put it down.
- Go to configuration and change the trigger delay to how fast you want the button animation to run. I would recommend half a second because text takes a while to disappear and reappear and if sequenced too fast the button will not appear as if it is being pressed.
- Now go back to channels and create a channel that will reactivate the button face. If you selected for only the player that triggered the button to see animation in Step 1 you can make every button reset when receiving this. Otherwise create a unique channel for each button. Once you have created this channel copy it and go back to the button face. Paste it in the activate when receiving on box in the channels tab.
After this you should be good to test it!
Result
 Gif had to be compressed, transitions are smoother irl
A heart or any constructive criticism would be greatly appreciated. Have a Happy Holiday!