So you know how his original FNaF guide was kinda difficult to understand? I’m gonna try to make that simpler.
Doors
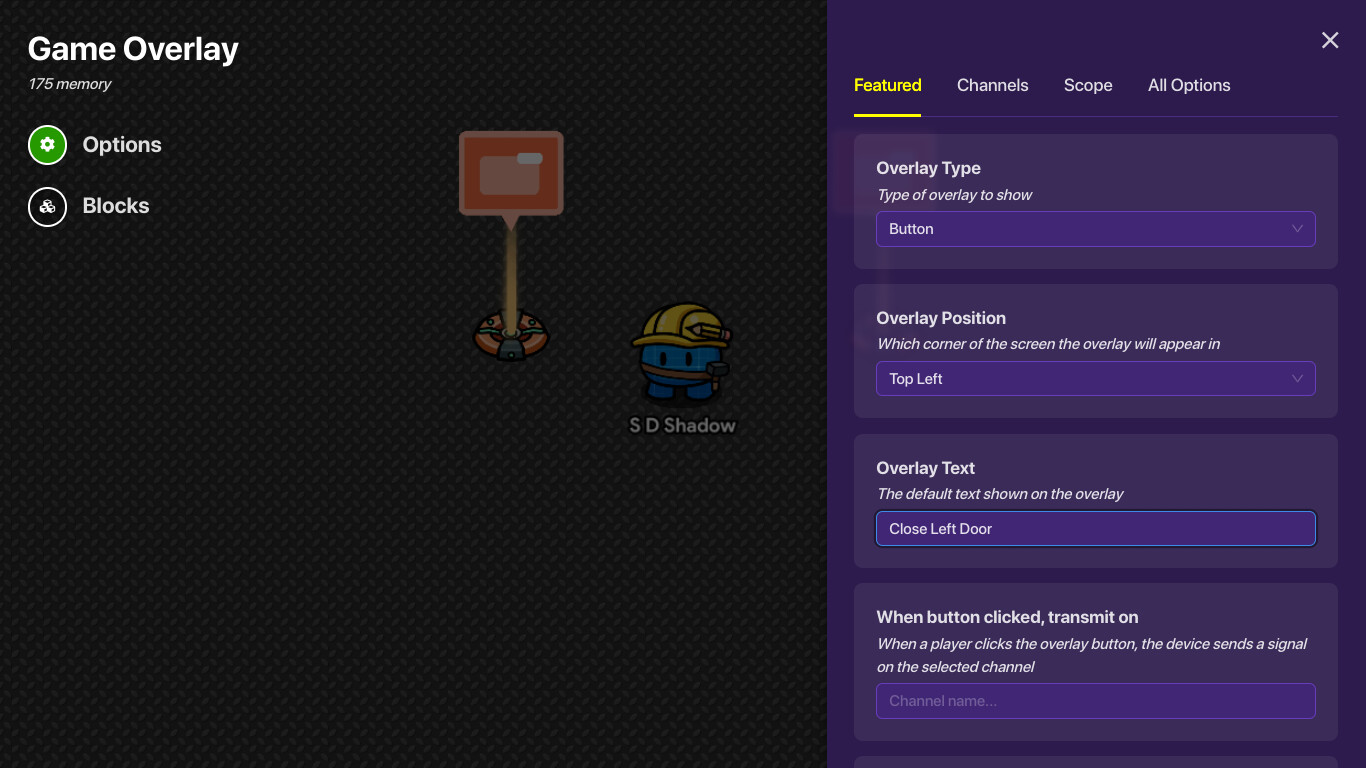
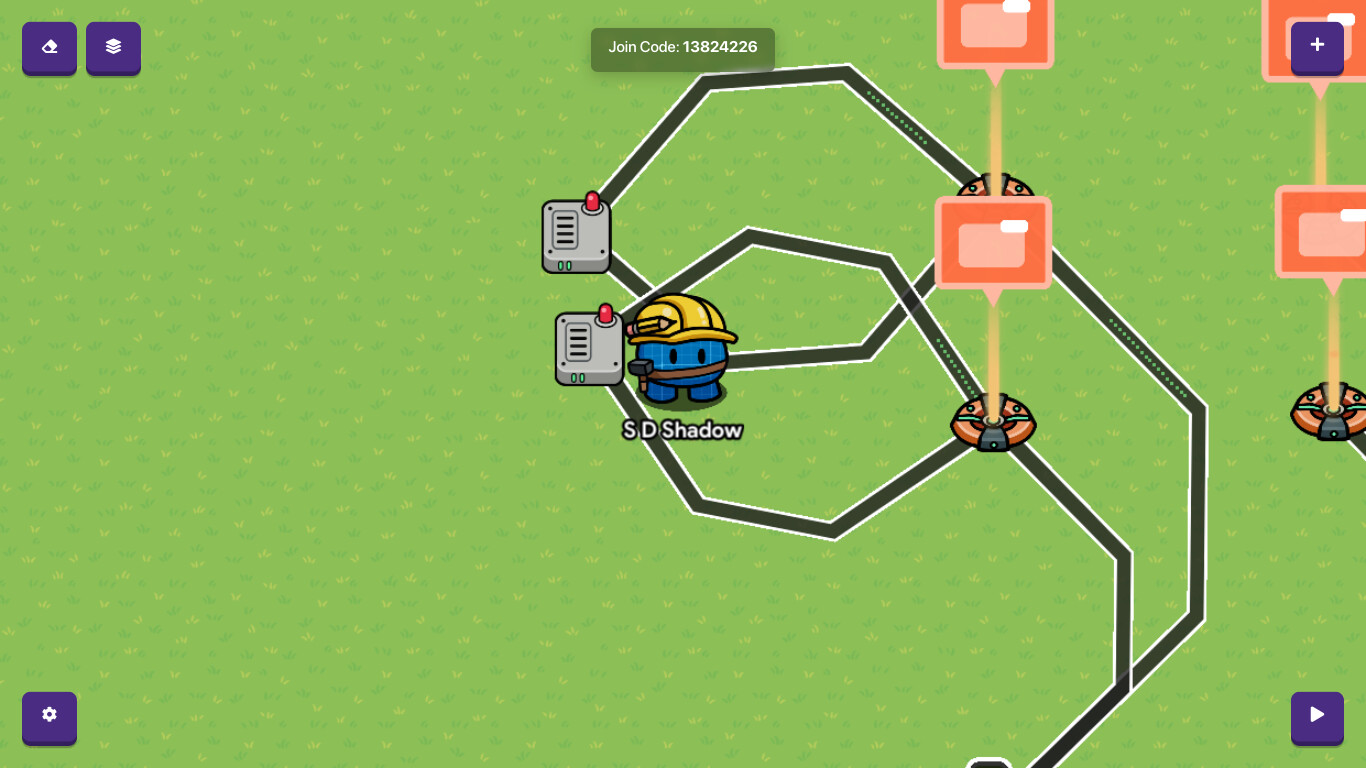
So what you’re gonna want to do for those is to get 2 game overlays, like this:

Name the Left Overlay “Close Left Door” and the right one “Close Right Door”
Set these to visible on game start, and set them to button mode.
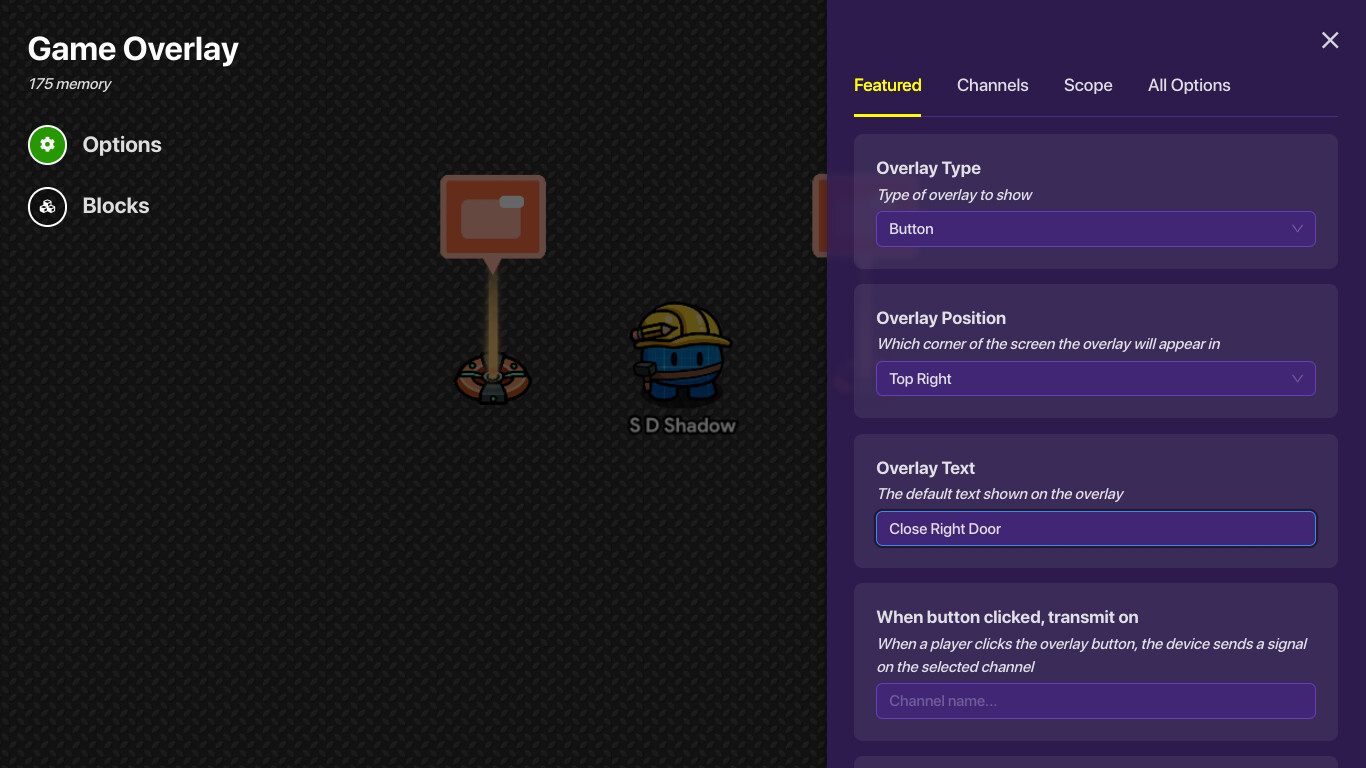
Also don’t forget to make the right door go to the top right. It should end up looking like this:
then you will need to have two kinds of doors (I prefer the barriers, they are easier to use)
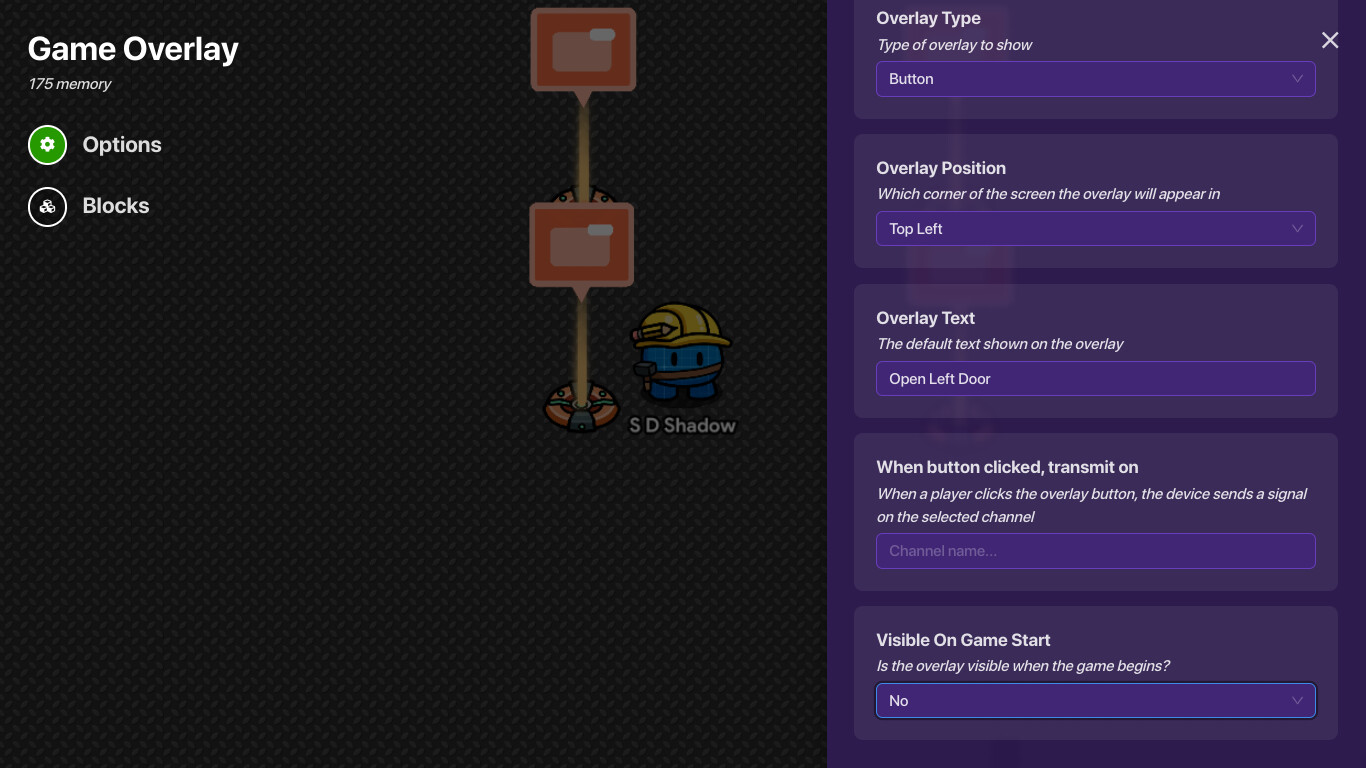
Add two more overlays, but name them “Open Left Door” and “Open Right Door”
They have the same settings but you need to make the INactive on game start.
Here are the settings if you forgot:
and vice versa
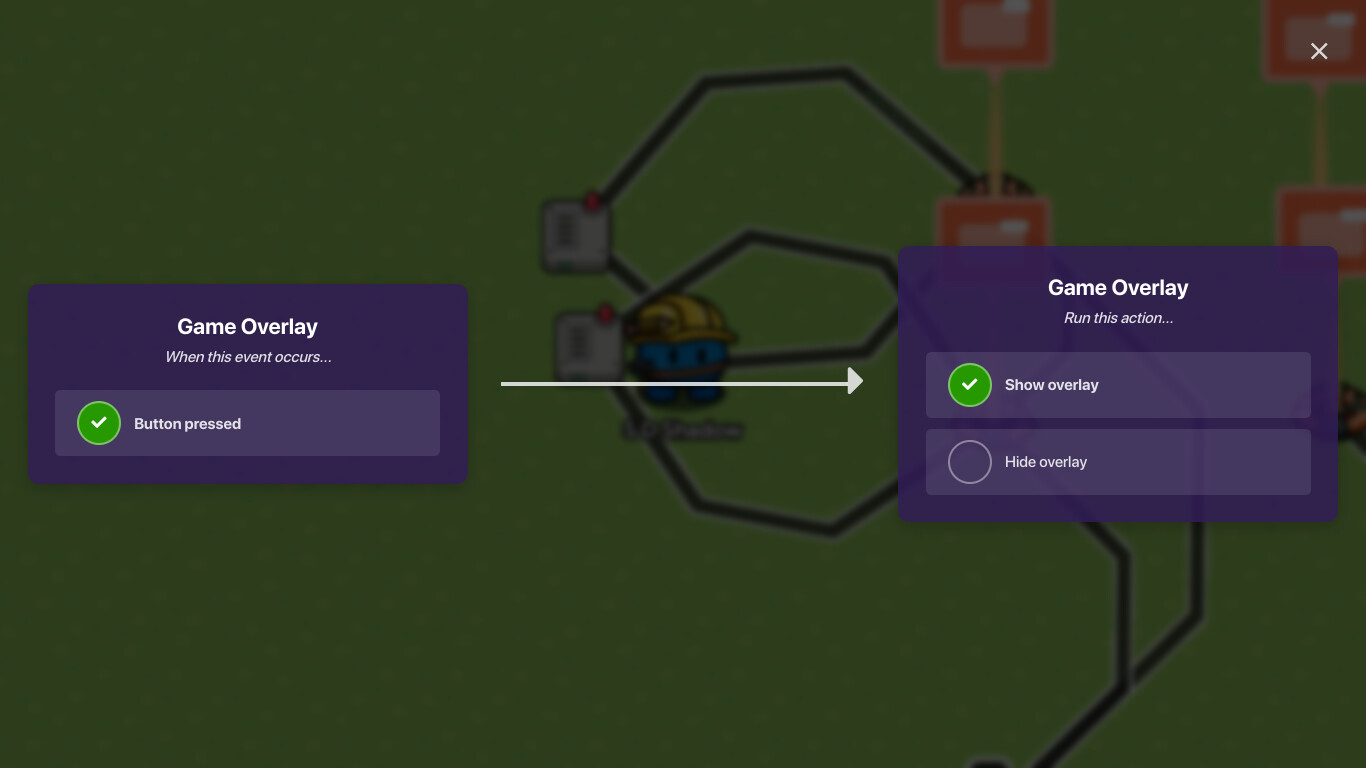
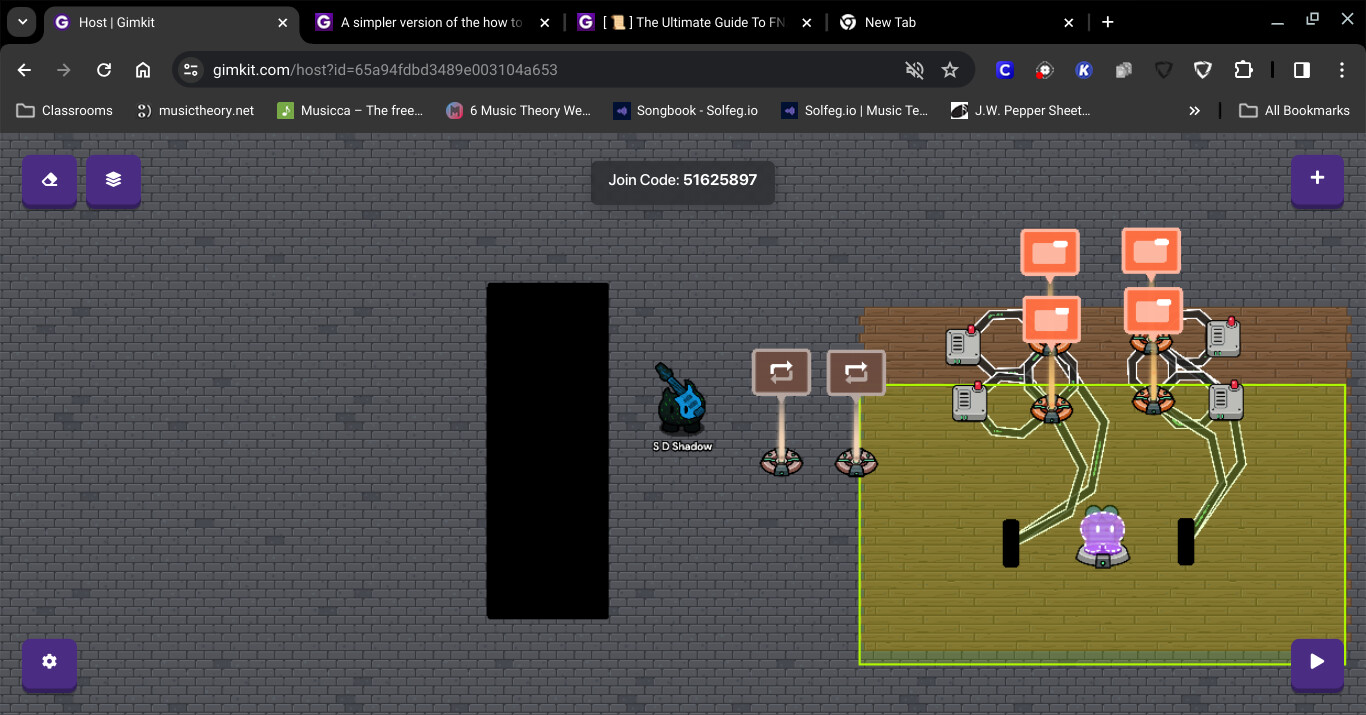
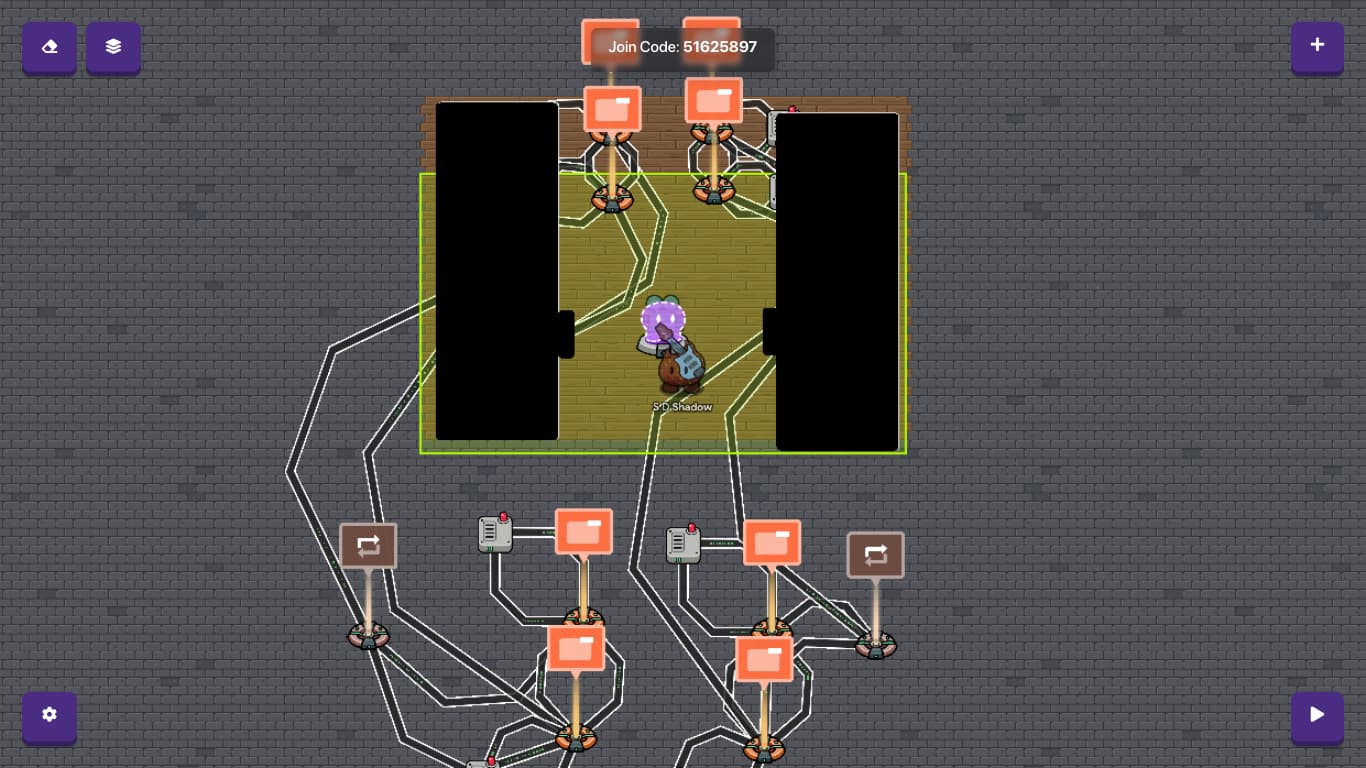
so then you need to wire these to they’re respective doors. Like this:
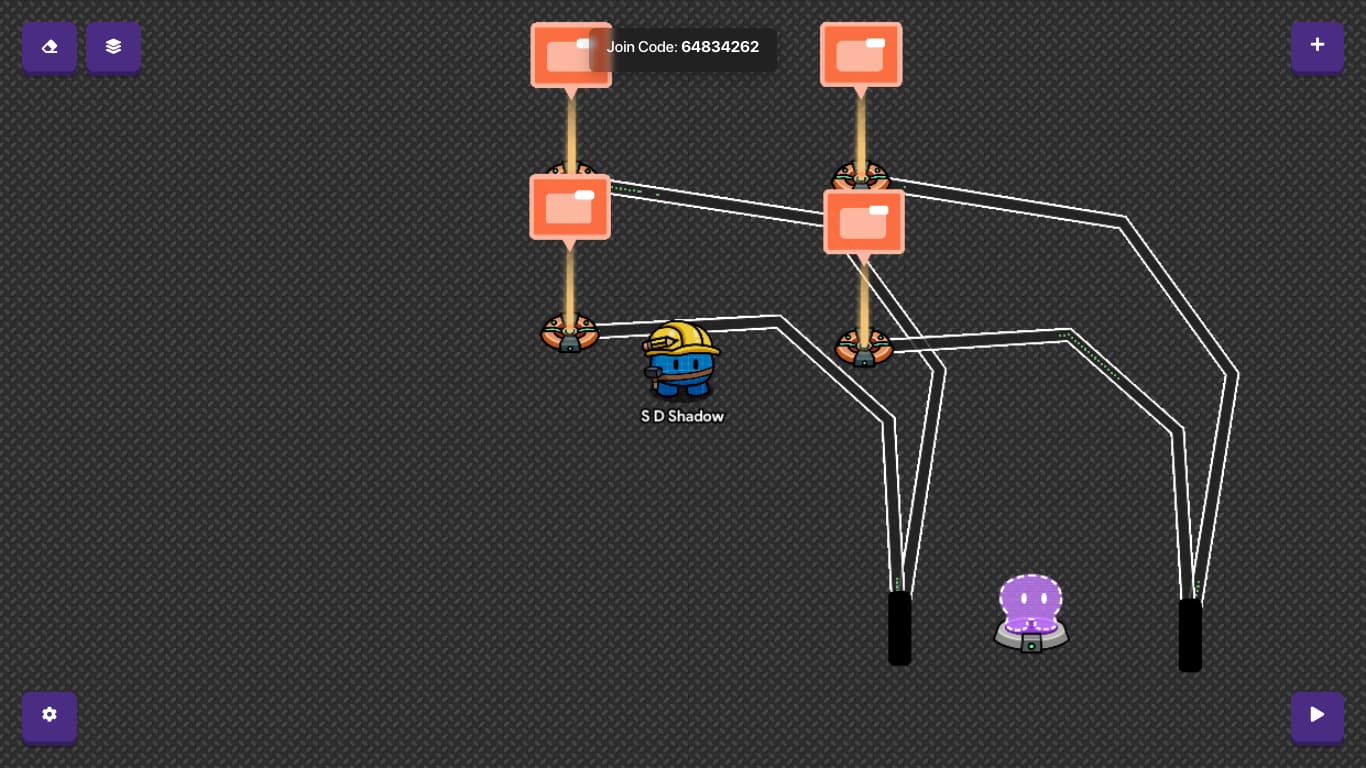
then add some wire repeaters. You’ll need 4.
You need to wire the close overlay into the wire, then wire from the wire repeater into the open overlays. repeat this for the othe 3.

ok so then once you have both overlays connected to they’re respective repeaters, you need to connect them to each other.
this should be you’re result:
repeat these steps and then you’ll have working doors!
Correction: You also need repeaters, 2 of them.
You can choose the intervals that they repeat they’re task but I suggest 2 ticks.
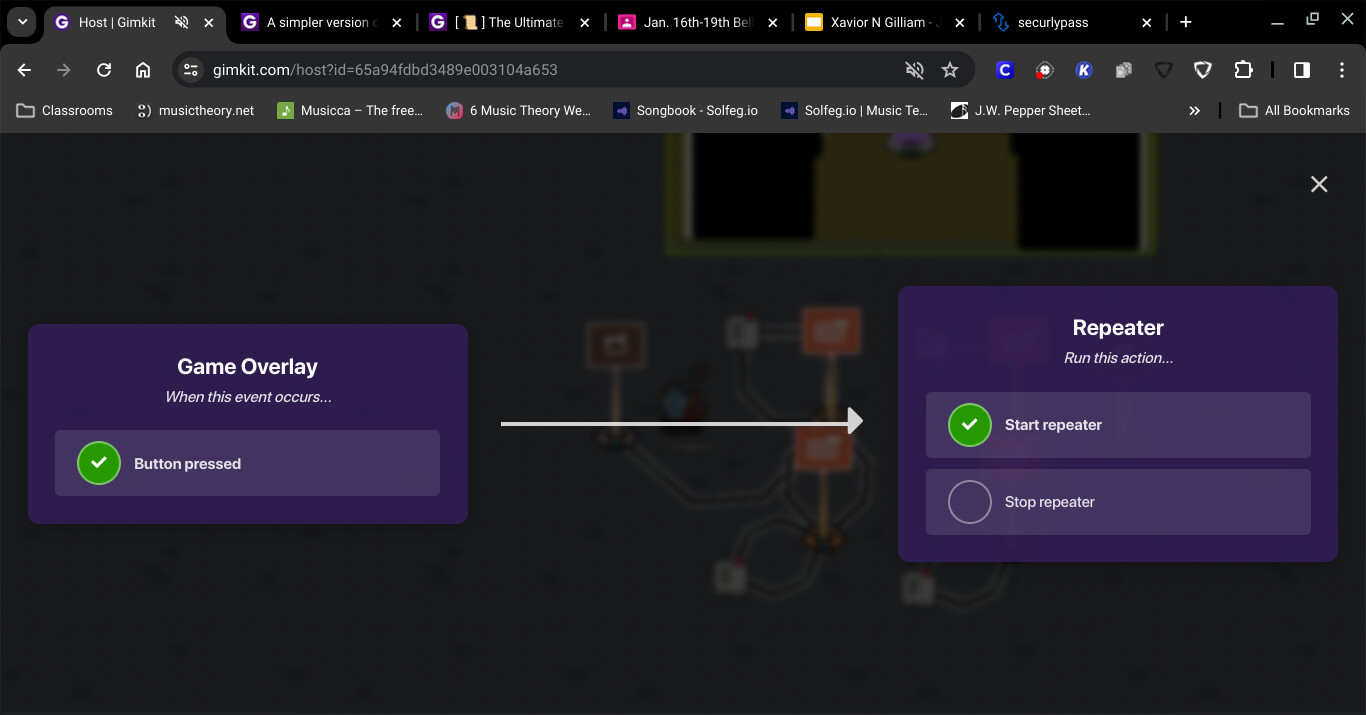
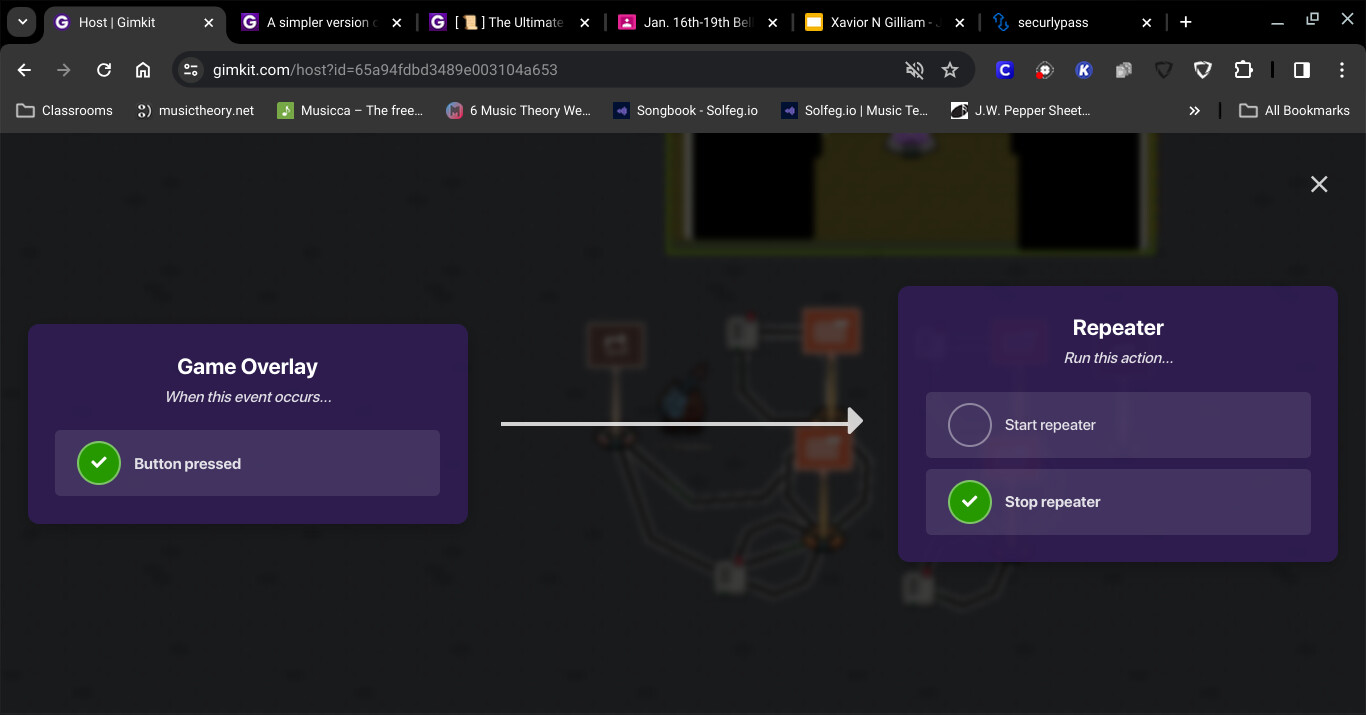
attach you’re overlays to the repeaters.
Set you’re close left door to START the repeater (I recomend wiring the left overlays to the left repeater, It makes it less confusing) Then set you’re open door to stop the repeater. repeat this for the Right doors.
Publishers Note: Please don’t share this on discovery. FNaF is copirighted, so it’ll get instantly reported.
Anyways, I’ll do lights soon. I have to charge my computer.
so far this is failing but I’ll try to see what I messed up. Also set you’re walls or barriers to not be visible on game start.
So you’re supposed to wire both overlays to each other.
When you are done it should look like this:
and now you should have working doors!
Lights! Everyone needs lights in FNaF otherwise how would you see Bonnie and Chica??
So what you need is 4 more overlays. The first 2 (top left and right overlays) need to be named turn on left/right light. They are both visible on game start. Set the left overlays to bottom left.
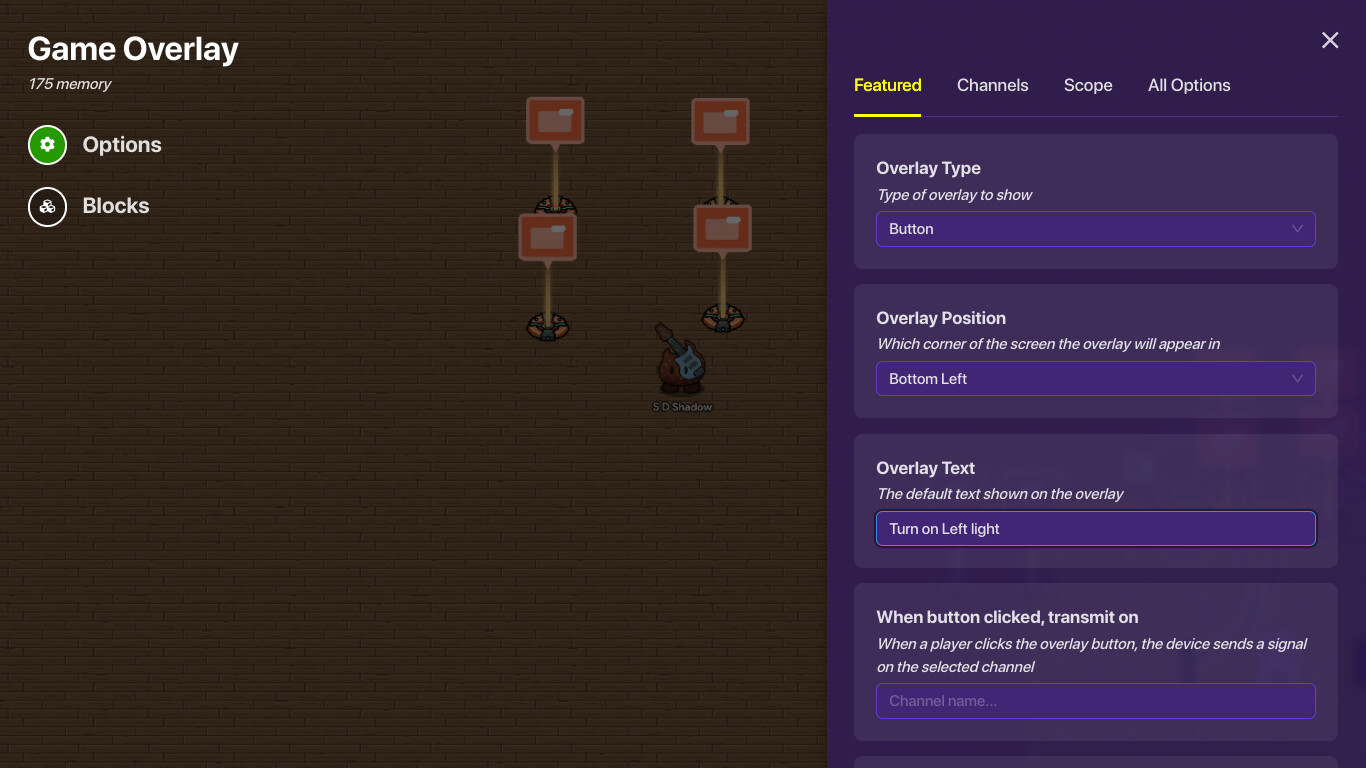
Do this for your right lights as well. name your last 2 overlays "Turn Off Left Light"and vise versa.
Here are the settngs for your bottom left:
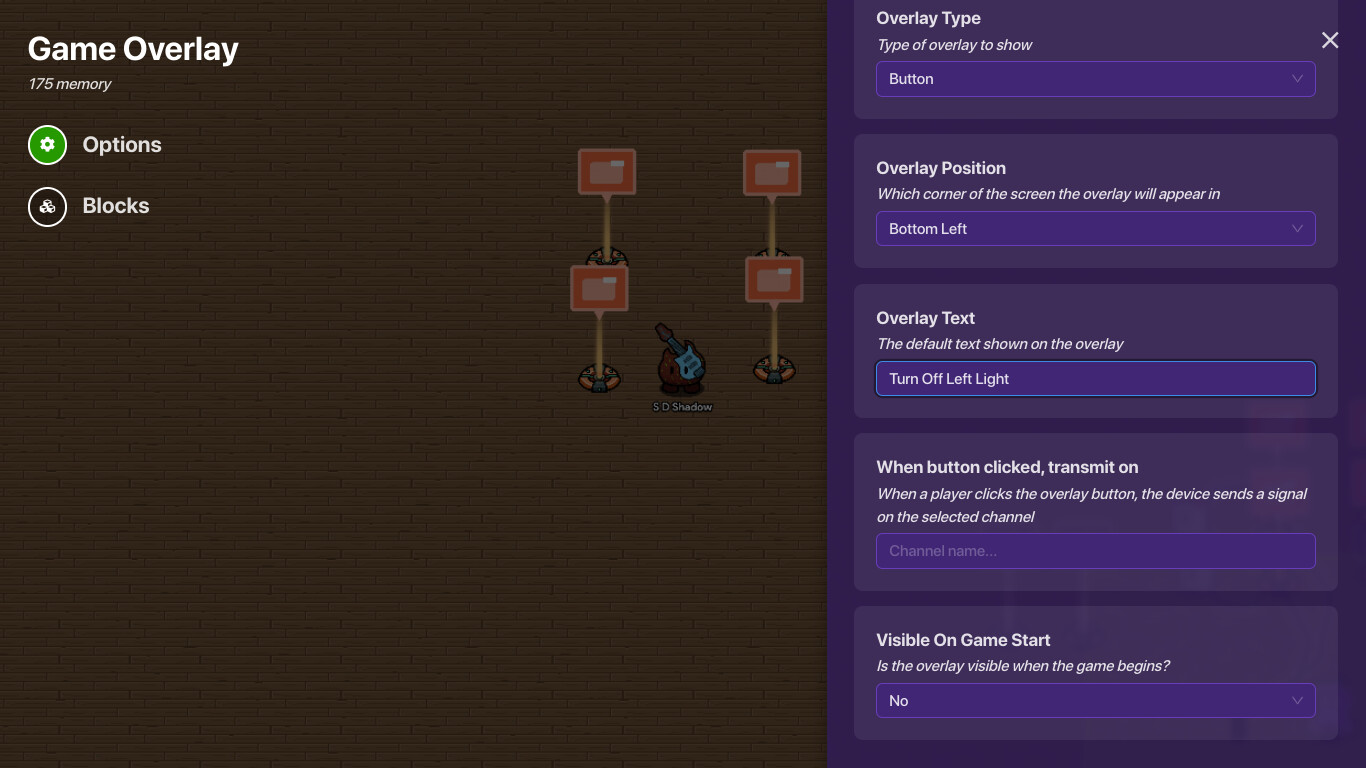
Do this vise versa but set the other right overlay to bottom right.
Lights
Lights! Everyone needs lights in FNaF otherwise how would you see Bonnie and Chica??
So what you need is 4 more overlays. The first 2 (top left and right overlays) need to be named turn on left/right light. They are both visible on game start. Set the left overlays to bottom left.
Do this for your right lights as well. name your last 2 overlays "Turn Off Left Light"and vise versa.
Here are the settngs for your bottom left:
Do this vise versa but set the other right overlay to bottom right.
Now do the same wiring you did for the doors

Now you need 4 barriers.
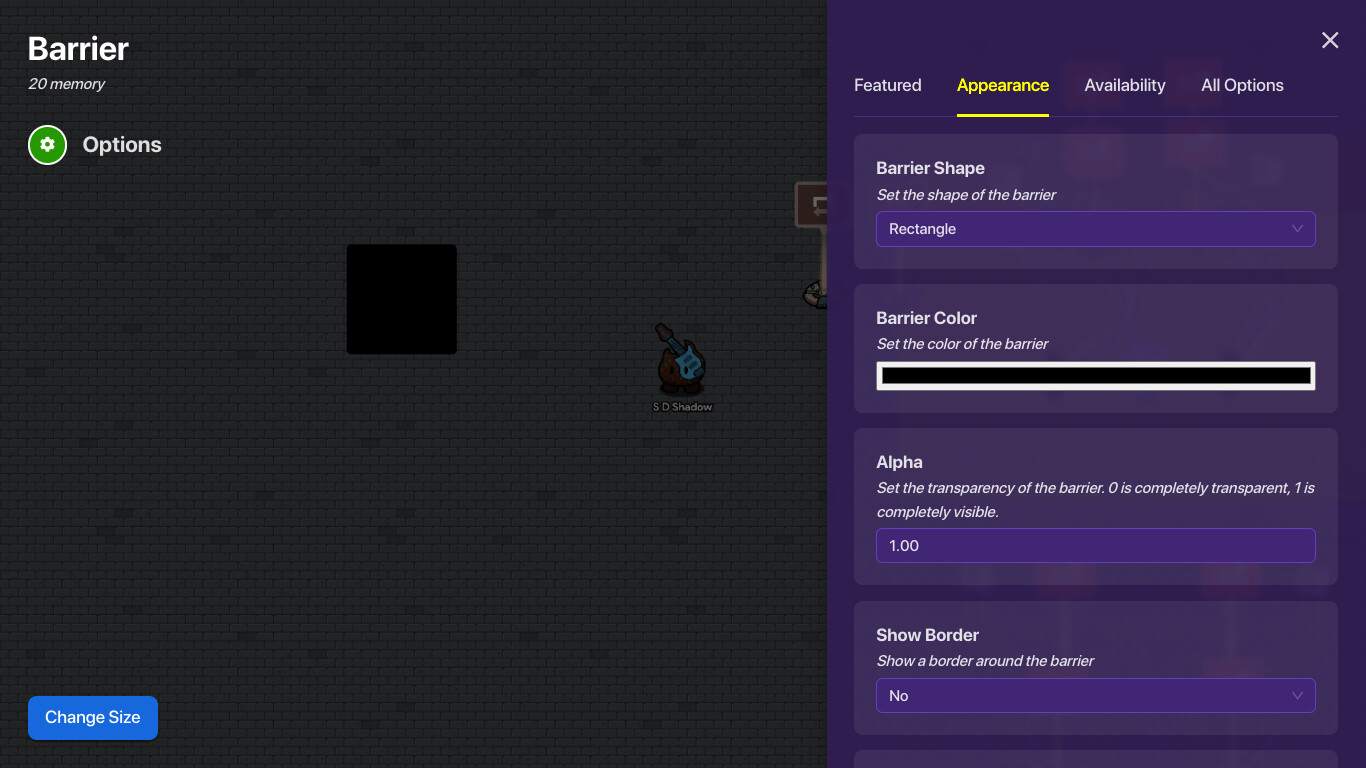
Set these settings, then edit it to this:
Then copy it (c key)
Now copy these TWICE change their color to white but make them a bit lighter. If you want to, you can make it black and make the Alpha lighter and make it looks like its flickering. But that’s more advanced than what I’m covering.
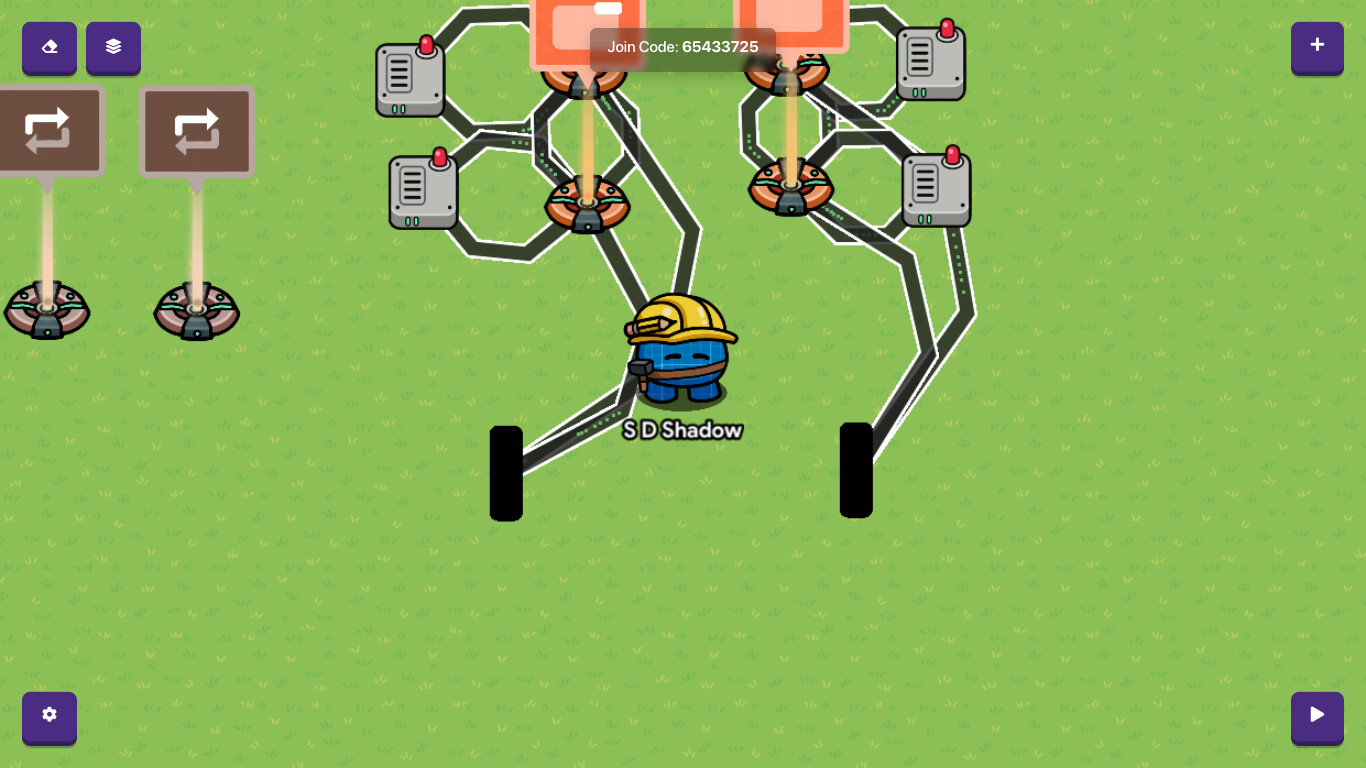
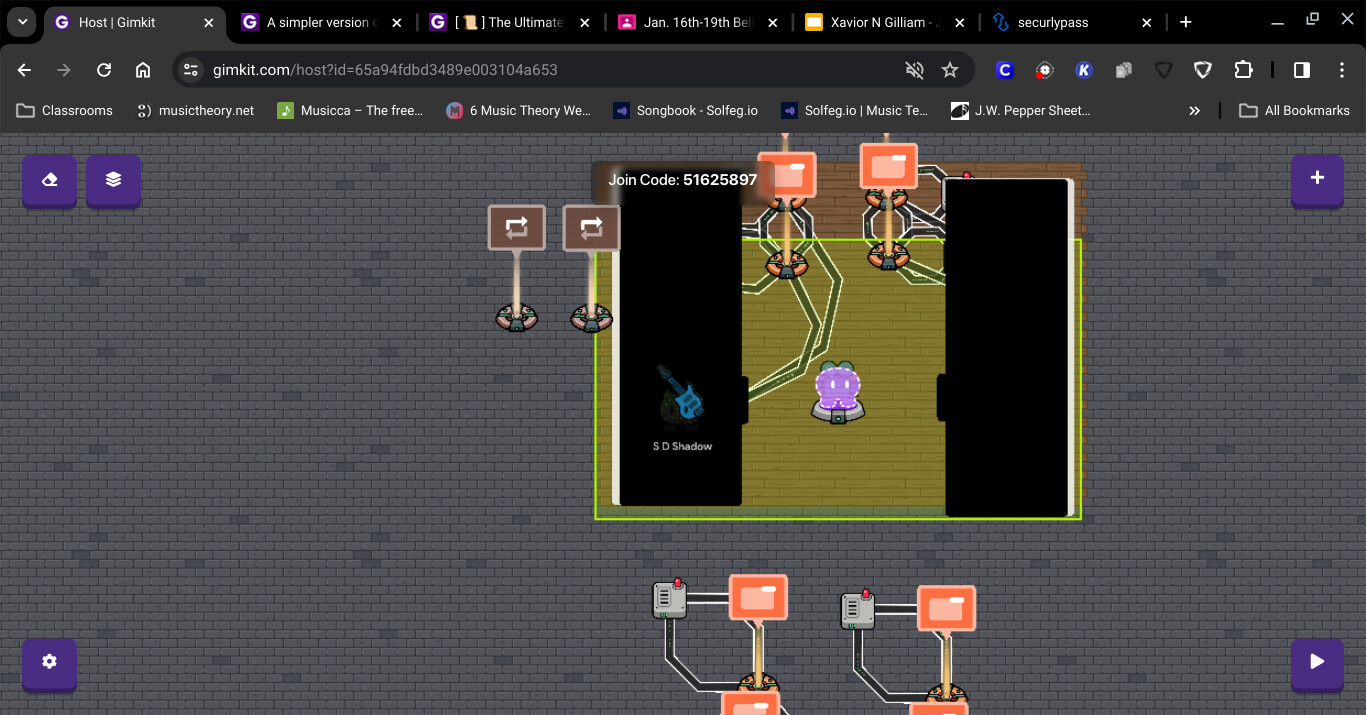
Arange them like this:
add 1 repeater for both of the sides.
These are the settings:
do this for the right side as well.
Wire the repeaters to their respective sides, like this:
Connect your turn off light overlays to the black barriers.
Your end result should be this:

Clock from 12 AM to 6 AM
This is a work in progress.
Clock
Credit to @ThatGim for helping me with this. We tried to make a more complicated version, but this is the one we settled on:
Anyways this is how you build it. You will need 7 Text boxes (This doesn’t use overlays, so you are free on that part ![]() ) I’d set the size to 50 and the color to white if you are on a dark colored map.
) I’d set the size to 50 and the color to white if you are on a dark colored map.
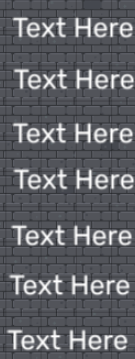
Then you need to name them like this:
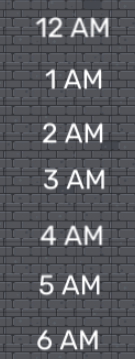
Then set the 1 AM, 2 AM, 3 AM and so on to not be visible on game start.
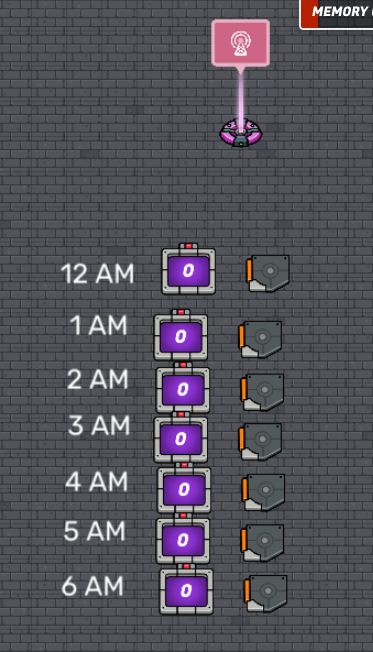
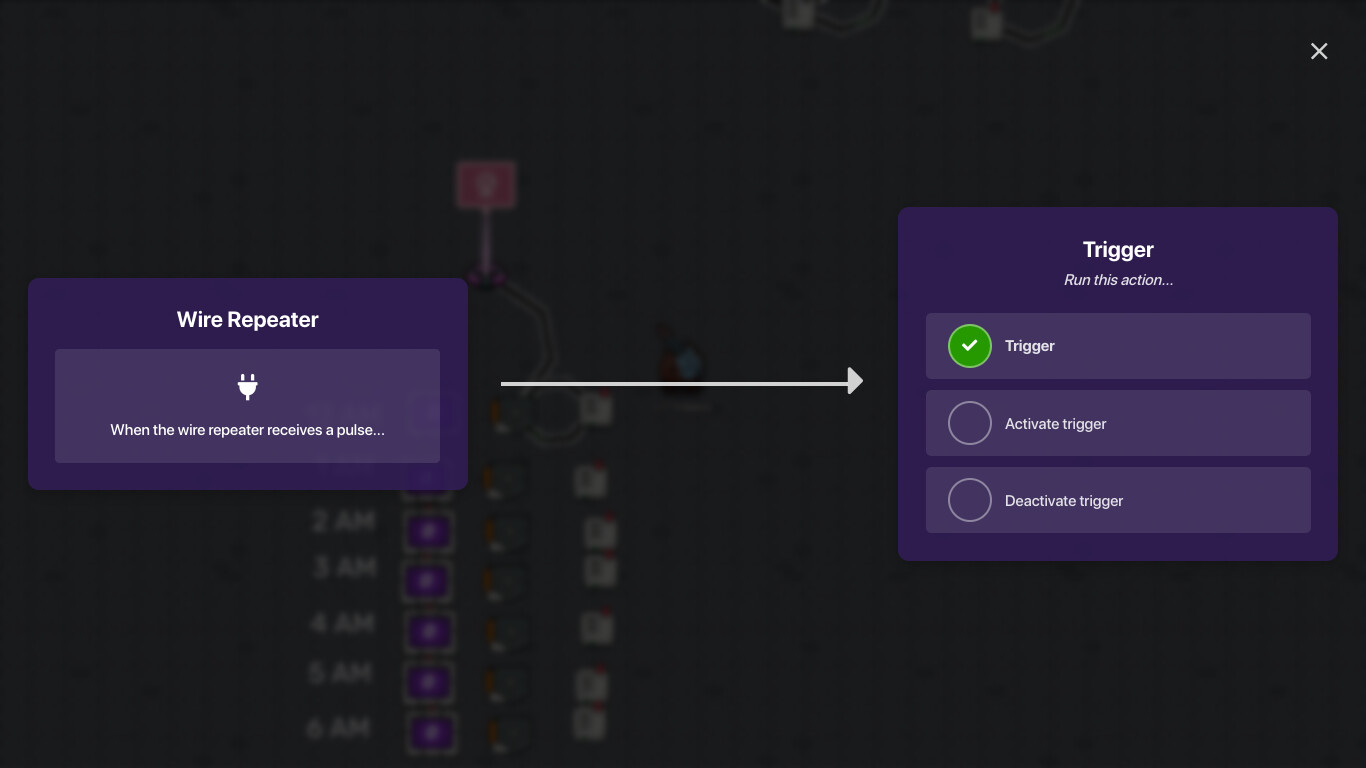
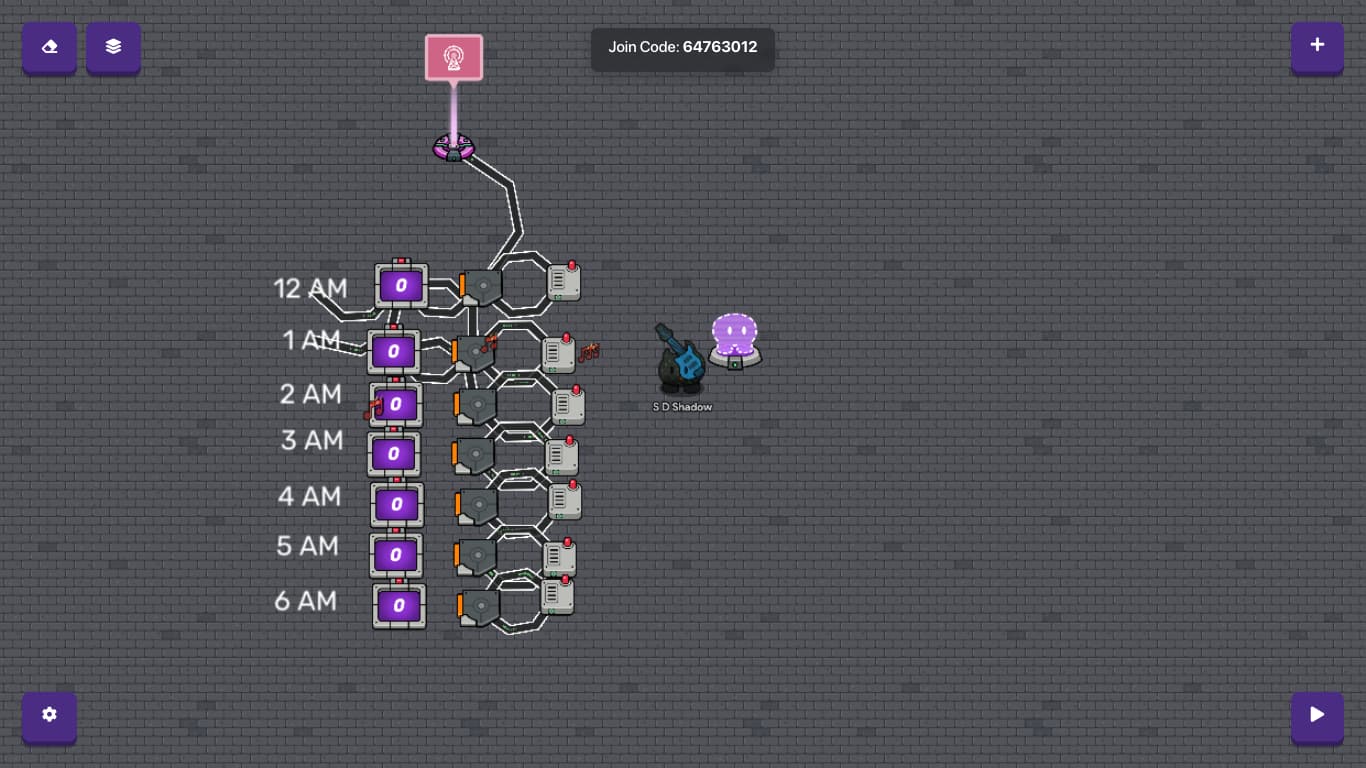
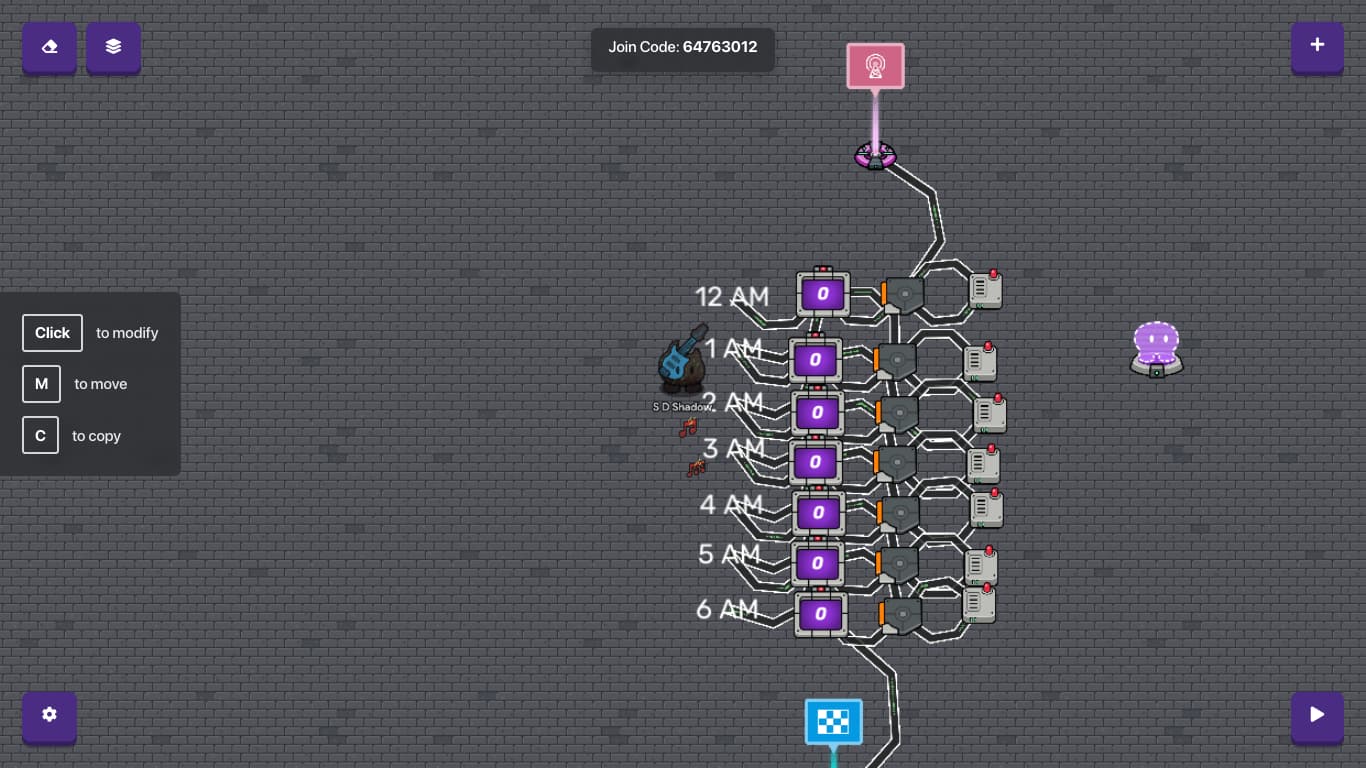
Then you will need a life cycle. then you will need 7 repeaters, 7 counters, and 7 wire repeaters. it should look like this.
Wire your life cycle to the trigger (I say use the triggers because repeaters have a limit, and you’re going to need ALOT of those for your map.),
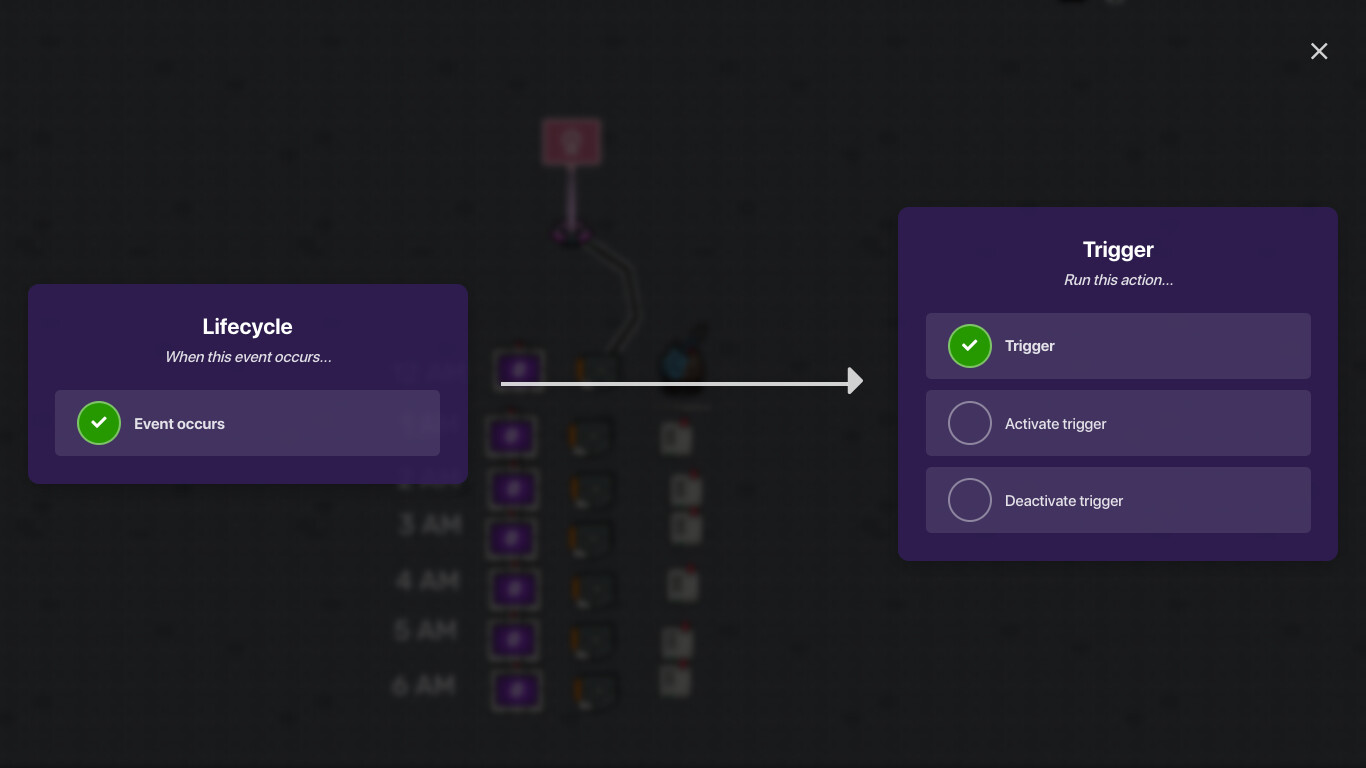
Then wire your trigger to the repeater.
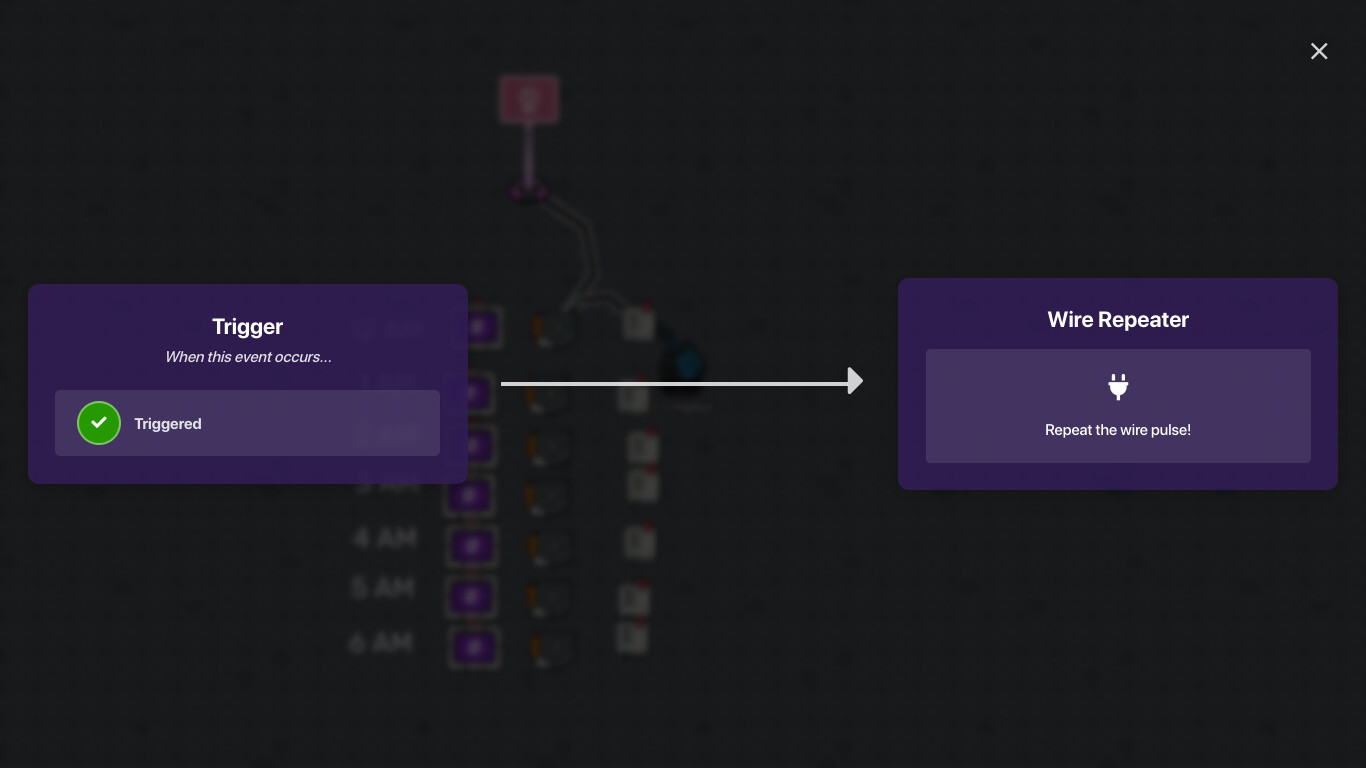
Do the last 2 images for the rest of the repeaters.
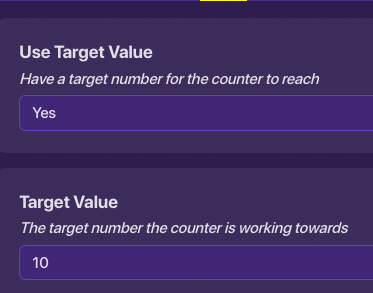
Set the counters target to 10
For testing purposes, set the trigger delay to 1 second.
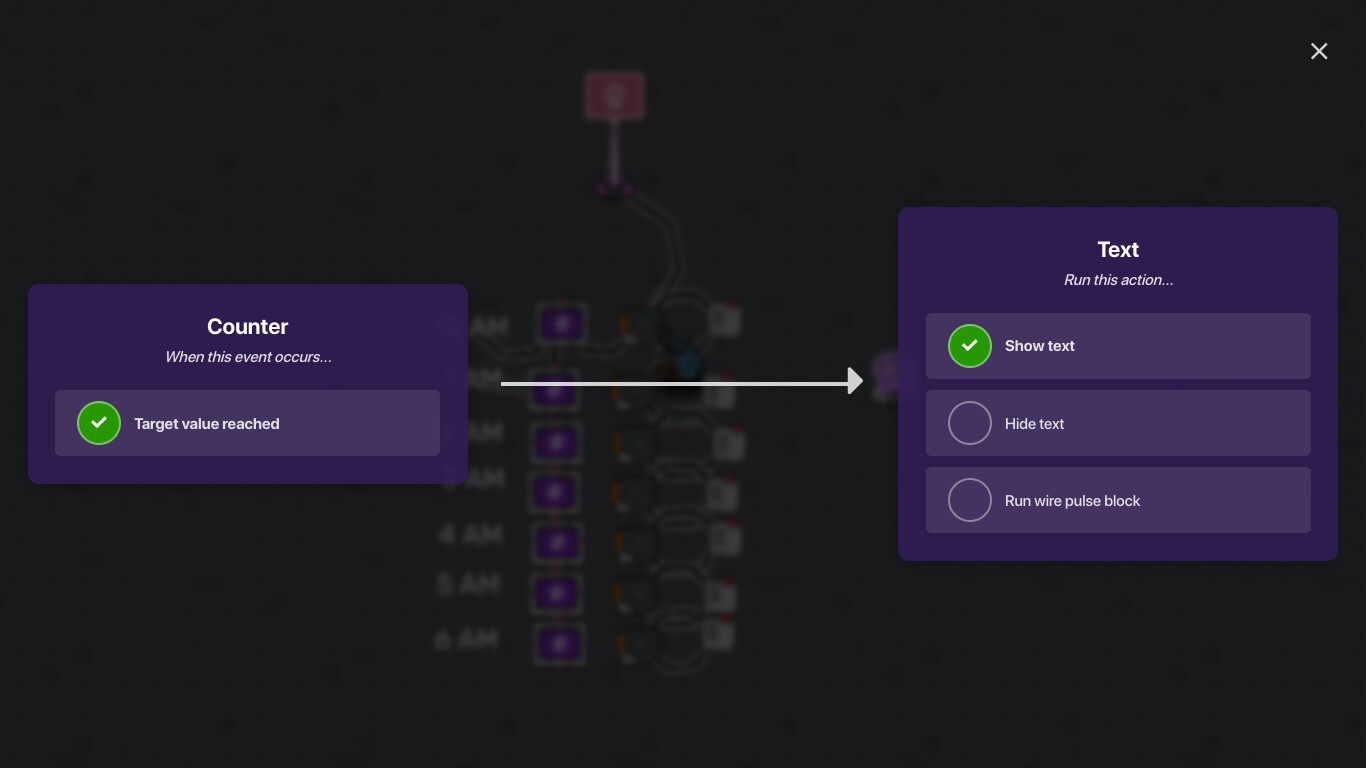
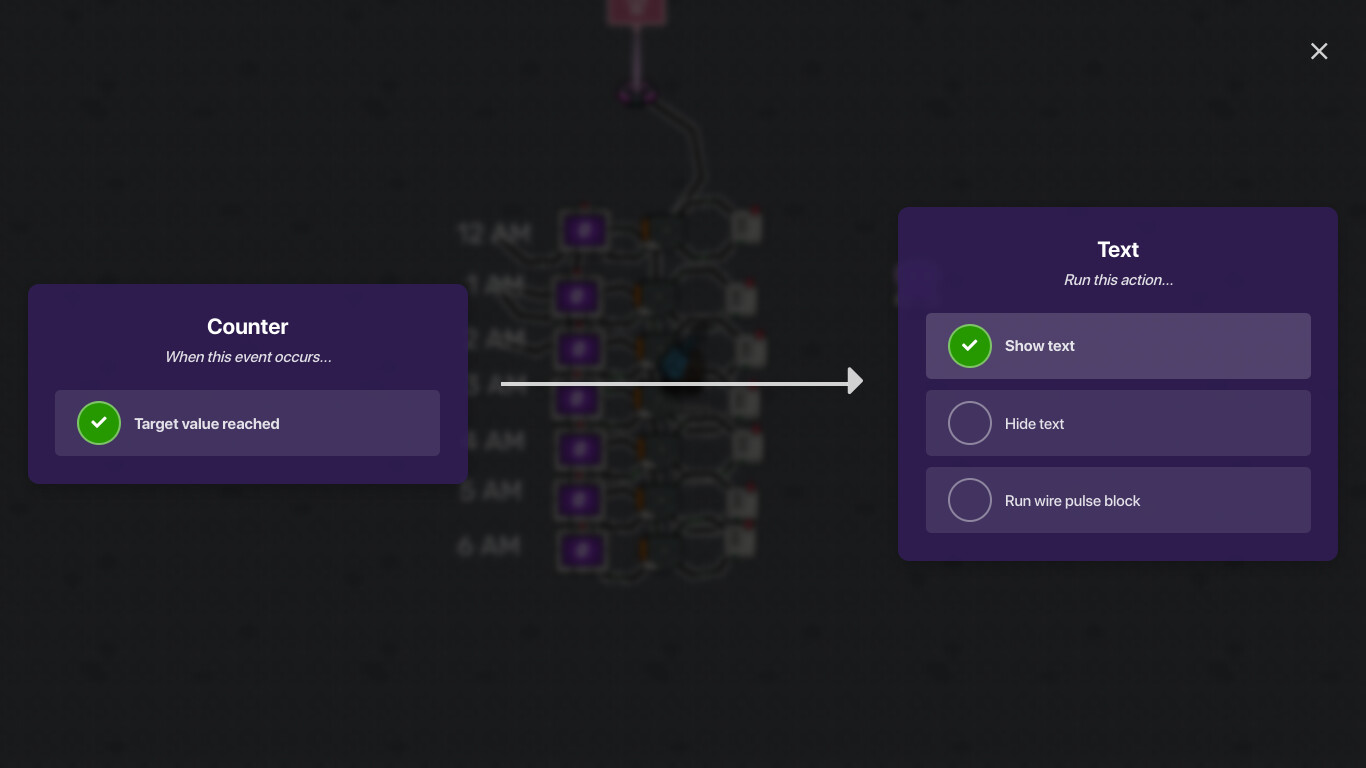
Wire the TRIGGERS first, into the counter. Then have it to increment the counter when triggered. BTW set the triggers to have not activate on collision. Make the counter hide the 12 AM text, then show the 1 AM text when the target value is hit.

Do this for all the counters, not counting 6 AM.
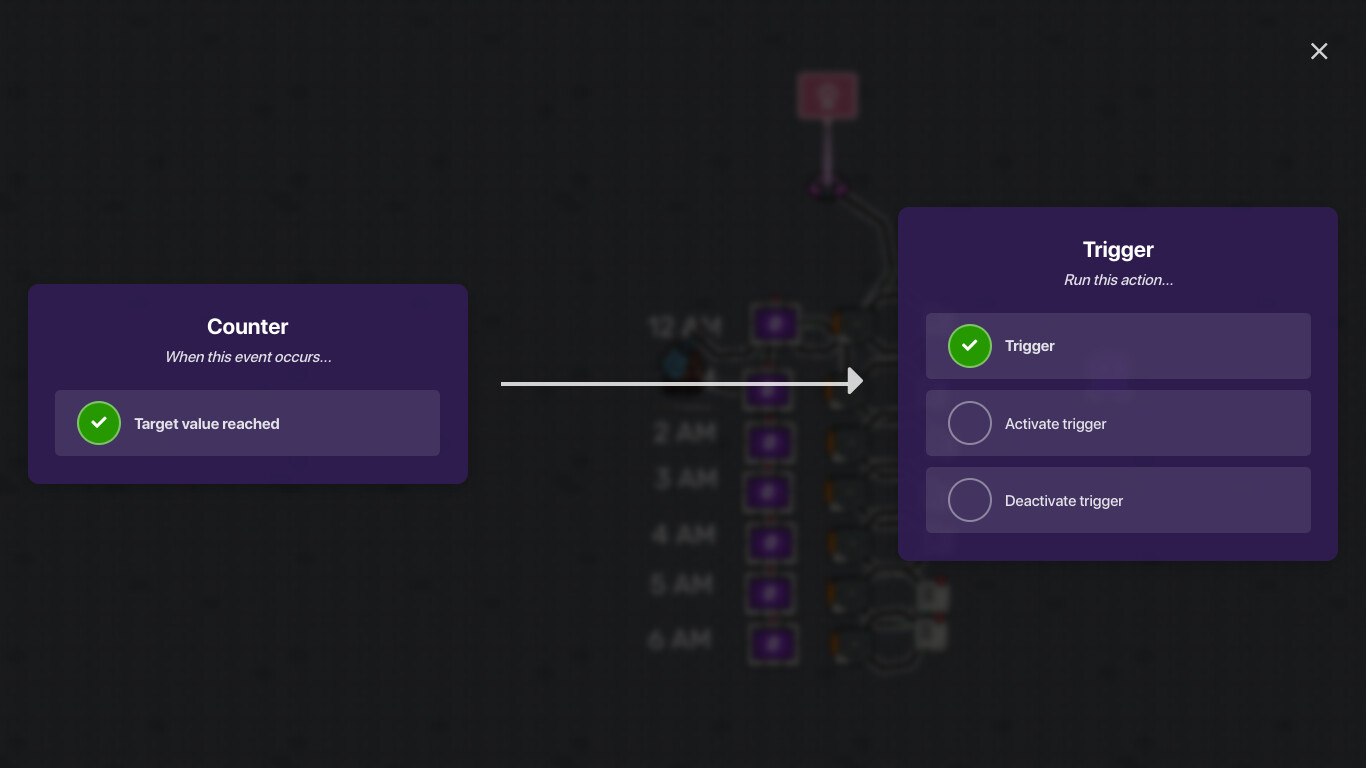
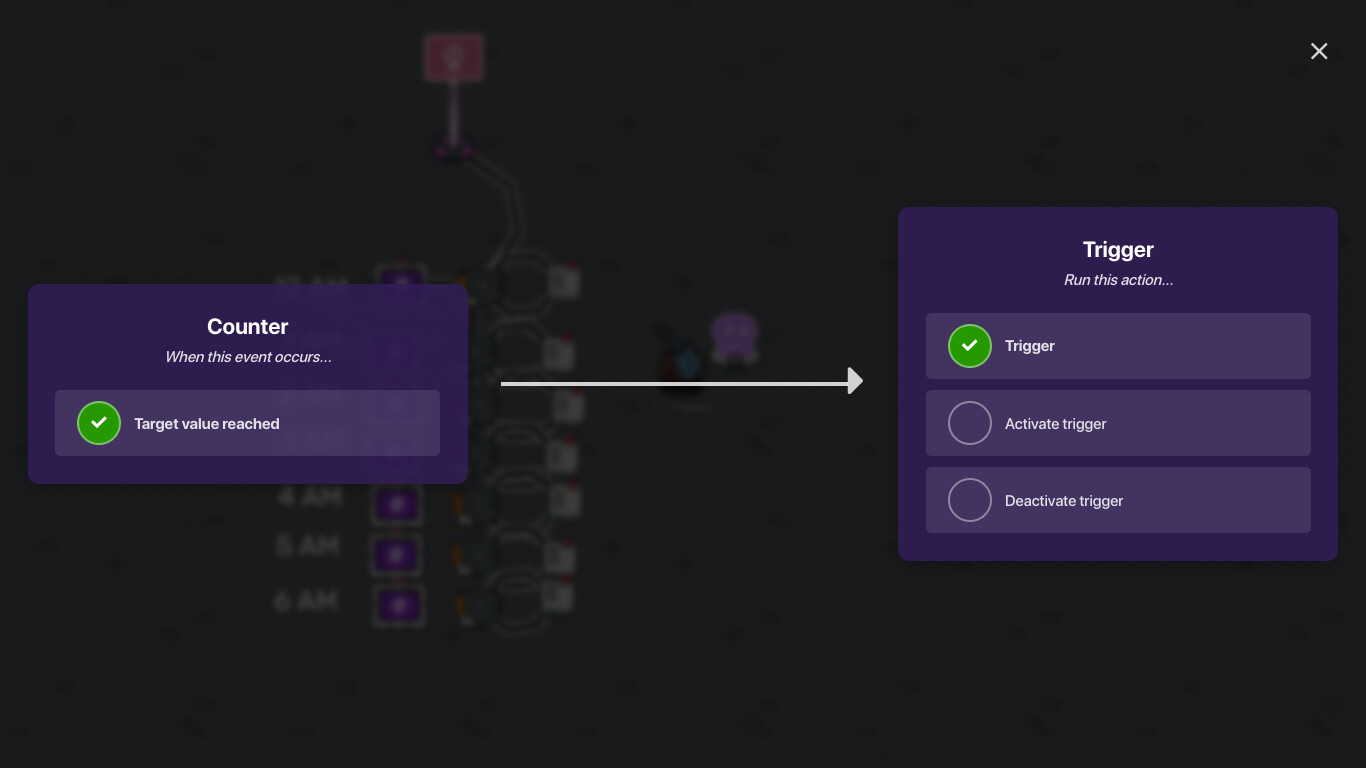
Then wire the 12 AM counter to trigger the 1 AM trigger when the target is reached.
It should look like this when the Wiring is done:
And this is the settings for the counter → trigger:
And I know it’s out of order, I’ll organize at some point.
The text wiring is like this:

wire it so it looks like this:
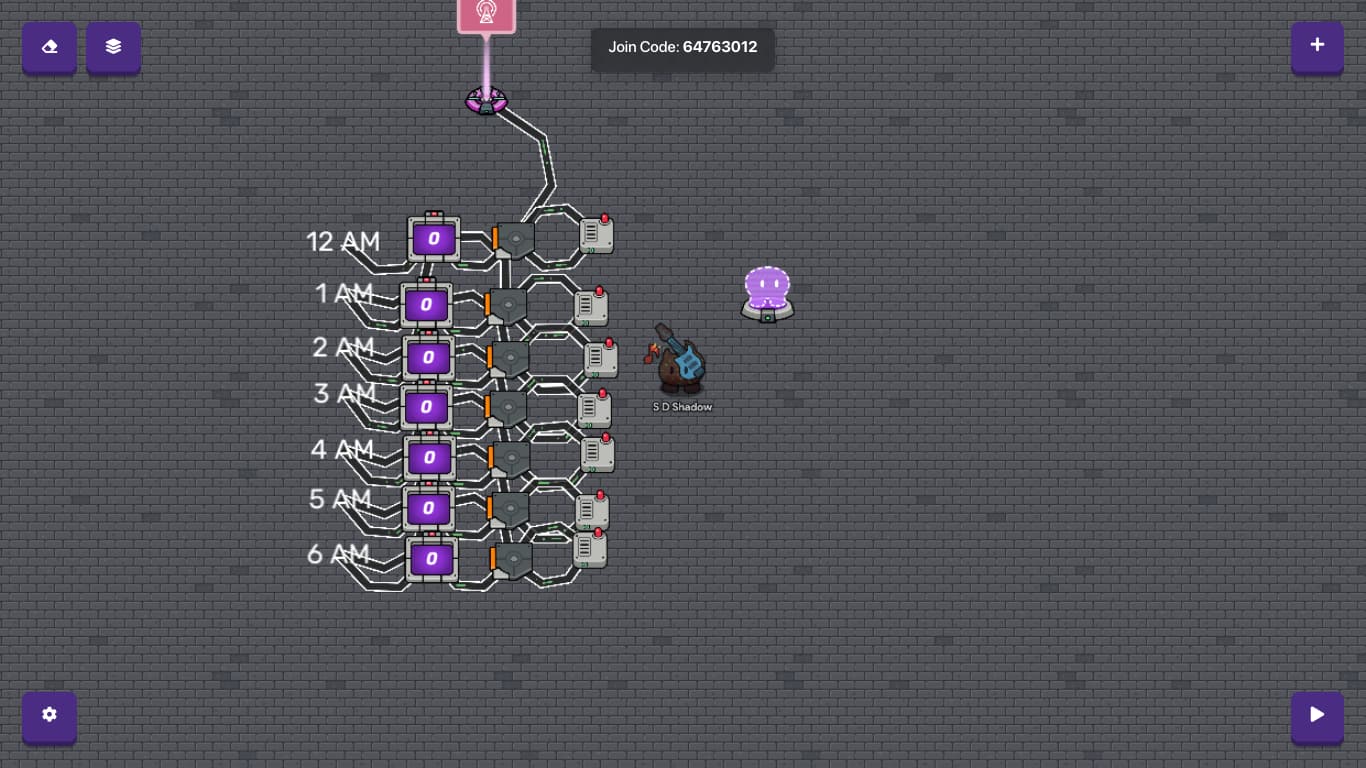
then add a end game, wire it to the 6 AM counter, and have so that when the target value is reached, it ends the game. It should look like this when it’s done:
Then stack the text boxes, (AM on AM, not number on number) and then move it up into your security office, (or whatever you’re using it for) then it (should) work!