A Potato's Mini-Guide to Making Houses


Warning: This guide contains cowboy lingo, shameless referencing of various topics, and the Creator being pretty much just silly in general. Potato Enterprises will not accept responsibility relating to any and all braincells lost from looking at this guide. Continue reading at your own risk.


Hello, hello, fellow forumers, and WELCOME to yet another Potato’s Guide! Today, I’ll be showing y’all how to create a house, Potatoian-style! So put on your cowboy hats and slap on your western boots, 'cause we’re in for a wild ride! :cowboy_hat_face:


Materials

  • A Laptop, Computer, Ipad, or Phone
  • Gimkit Creative
  • Map Memory → I believe it takes somewhere under 0%
  • 14 Barriers → No borders, with opacity at 1.00
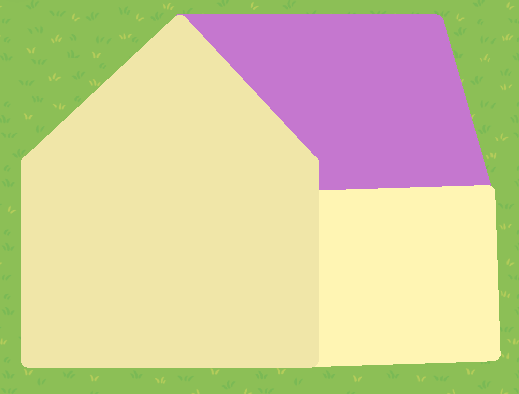
The Basic Shape

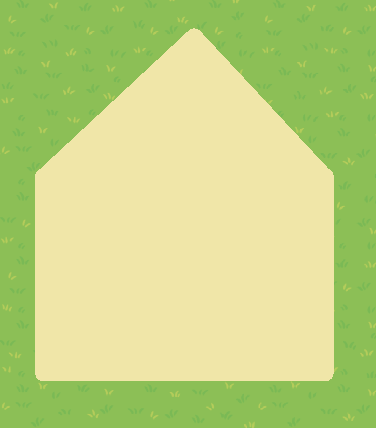
First, you’ll need to tint two of your barriers to RGB(240, 230, 169), then crop & rotate them until they both reach something resembling this mess:

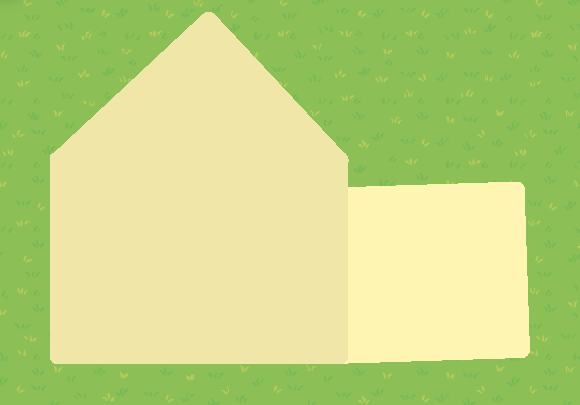
Then place them together like so:

After that, grab yet another barrier, color it RGB(255, 245, 179), lengthen it, tilt it ever so slightly, and attach it to the two barriers you already placed.

And that’s the basic structure finished!
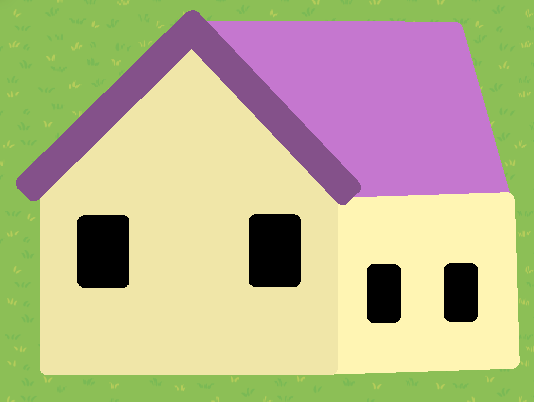

The Roof

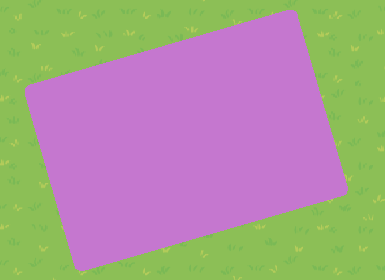
This bit is a tad shorter, with only two barriers to place. The first barrier I tinted RGB(197, 119, 207). However, if you wish, you can change the color to whatever suits your fancy! Tilt and extend it until it looks something like this:

Then place it on the structure.

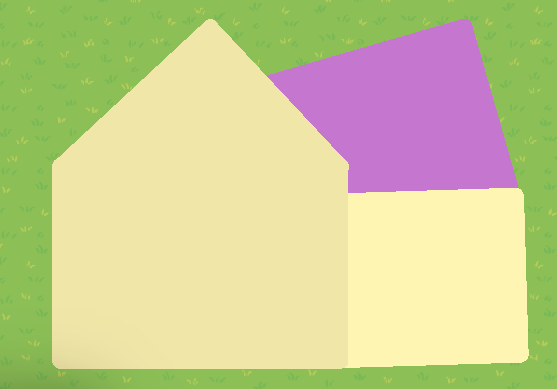
The next barrier will be the same color. Stretch it out into a small rectangle:

And add it onto the other barrier. You’ll want it to line up with to tip of the “triangle” barrier you used in the previous structure.

Next, take two barriers, tinted to RGB(132, 81, 138) or a darker shade of your original roof color, and (you know the drill) stretch and tilt until they form two equal flipped posts like these:

Put them on the opposing ends of the roof where it meets the structure, and B00M! Finished roof!
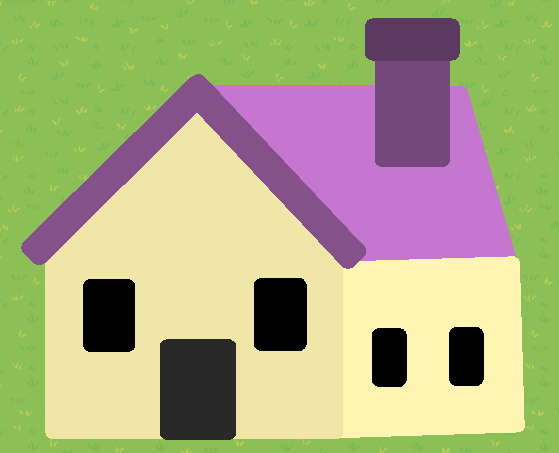

Extra Details

For this section, everything is optional. You can decorate your new house any way you like, but this is my take on what I think looks especially sigma slay :nail_polish:
Anyway, because of the optionality, I won’t be explaining this section as in-depth as the others.

Like the others were even that in-depth in the first place–

GET OUT, CONSCIENCE, YOU AIN’T NEEDED 'ROUND THESE PARTS :cowboy_hat_face:

With all that said, here’s the last bit of my guide!


LIGHTS


CAMERA


ACTION!


End Note

Okay, I lied, that wasn’t the last section. Now, I brought you here today so you could learn how to make a beautiful house in my style, but I want y’all to know that the technique I displayed in this guide has almost unlimited possibilities! I already said that you could vary roof colors (Animal Crossing Flashback), but you can also toy around with the structure sizes to create bigger or smaller houses, add doorknobs (I honestly don’t know why I didn’t), decorate the walls, add brick texture, etc, etc. I actually made multiple different houses myself! Here’s one of my favorites:

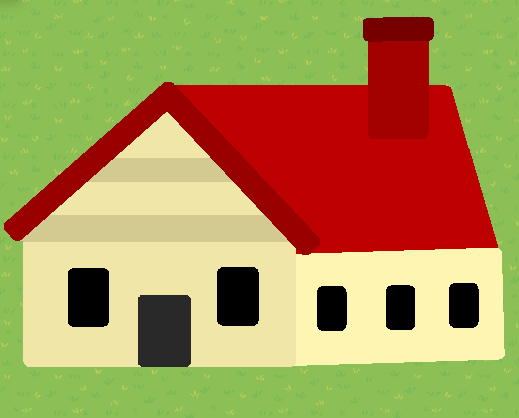
In addition to this, my guide doesn’t even BEGIN to cover apartment complexes, hotels, or other buildings! That’s all open for your experimentation! So go on and build some houses!


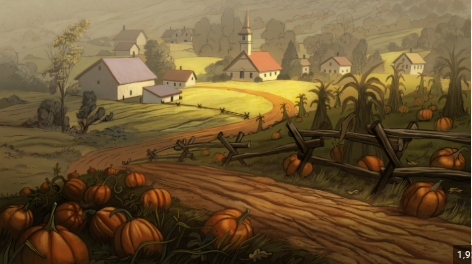
Fun Fact: This guide only came into existence because of this image right here:


An image from Over The Garden Wall, which was the Creator’s chrome background at the time of the guide’s publishing. They were making a game, needed house designs, looked at it, and then attempted to recreate the houses in Gimkit. They thought the house turned out so well that they should make a guide on it, especially since a bunch of the other house guides had their pictures removed. Anyway, that’s the history of this little guide right here!


Thanks for reading, and I hope you’ll find your way to another one of my guides soon!

Ciao!

24 Likes

wow it’s a house! never thought of making one but this is cool

2 Likes

I really love this guide, I think there are other house guides…
OH WOW!
Never mind! This is the first guide on making houses I’ve seen!
Details and descriptions were great!
Pictures helped support the descriptions/captions!
Love how you spiced the whole guide up with the Potatoian-style!

think I lost braincells from all the brain rot but your not liable =D

Great intro, middle, and end (how you stated where you got the idea from)!


love the inspiration and including the readers into the guide but, maybe make a section on castles, towers, or fallen/collapsed buildings.
like, the more complex things!

I didn’t do the _/10 thing because you got 10/10 on literally all the things ngl

Overall, awesome guide! :potato:

EDIT:

I’m a math girly, I love math. that’s a 66/70 :nerd_face:
(I’m lwk bored rn)

8 Likes

Yoo, very nice.

I honestly thought it was gonna be one of those lemme-put-this-together-in-five-minutes type of guides. (No offense lol :sob:)

You incorporated everything a guide needs, good designs and descriptions, good humor, and good organization.

Well done, will have to use this sometime :clap:

2 Likes

This turned out so cute!

I’m bored so like I’ma rate it because I have too much free time

Cracks knuckles adorably
TW: :warning: Opinion :0
(Everything thing here is my opinion and you are not obligated to really even read this or care so yars)


HUMOR/FUN FACTOR: 9.5/10

we love the cowboy lingo. It’s a classic. (I am also guilty of succumbing to the cowboy) only thing is like I lowk got bored during the middle portion of the guide. I would recommend sprinkling some in between the conclusion and the beginning. (just a small bit ykyk) Other than that I giggled at quite a few parts lol.


FORMATTING 10/10

I absolutely ADORE formatting. It’s my will to live. A lot of guides rly like lack in formatting (cough because no one really gives a flying sandwich about it) but you DID AMAZING WITH IT AHHH. The italics, the bold, the lines, the headings, the details! :star_struck: It’s delicious :face_savoring_food:


INTRODUCTION: 9.5/10

Starting off with our greetings, we love being welcomed into a guide. Yknow gotta make them feel at home. In my opinion the opening and closing of a guide is the single handed most important thing in a guide. You gotta reel them in and then give them something to remember on the way out. You did so good on this introduction. There’s always room for improvement on small things though. Other-wise, fire.


CONCLUSION: 8/10

Okay so the conclusion sorta kinda lacks compared to the rest of the guide. DONT GET ME WRONG IT WAS GOOD, but like it could be better frfr. I think if you sorta left them with an ending question such as “what type of building would you like to see next.” Or wmth that gets them thinking or would be more interactive. BUT ALSO THIS IS JUST MY OPINION SO LIKE DOES IT RLY MATTER


CREDITS: 10/10

this is lowk a mini section, thanks for crediting where you got the idea from! If someone else is interested in expanding their homes they could go to your game and use the houses as reference, and it’s a lot easier to find it if you link it or mention it.


GRAMMAR: 10/10

Not much I can say here :folded_hands:
Thank for capitalizing your letters ig?


EXPLANATION: 9/10

You did a pretty good job explaining this! I do feel like some of this is centered more around visual learners, so I would recommend saying angles like, “put these at a 90° angle” but also this lowk biased because I’m more of a reader not a looker.


Overall your score is like a 9/10 or smth I don’t do math so u can calculate yourself.

This was a really good guide and I hope you create more in the future!

P.S you really don’t have to listen to all of this I’m just spitting out my opinion because I have free will ig.

thanks for reading!

7 Likes

Arcanium Bump
Cuz it a cool and good guide

2 Likes

Bump the bump, and add reusability

Pls don’t not check within 48 hrs of last check, thanks!
The limit may change depending on how wisely you use this checkbox:

What part of ‘dont check within 48 hrs’ do y’all not understand :sob:
also what part of ‘reusable bump’ do yall also not understand…

5 Likes

Please like instead of posting. Also, please try not to post after a reusable bump unless you have something to fix.

So a new reusable bump:

Rip reusable bump, maybe someone can make a new one.

6 Likes

@GimkitLover1 you could have just edited that into the wiki bump -_-

yay @Jhan you’re alive!

3 Likes

bump
what’s a house guys?

9 Likes

imagine boomping your own guide
couldn’t be me

8 Likes

Bampity Bumpity

Bampity Bumpity

Bampity Bumpity

Bampity Bumpity

Bampity Bumpity
Bampity Bumpity
6 Likes