awesome guide, its really cool
1 Like
Nice!
For computers that have PowerPoint you can record a video directly in PowerPoint and download it to put in a guide.
1 Like
permission was given to post this, as long as macbook and ipad/other methods are added too
22 Likes
I made the same topic before, it was hot there. In the end the topic was closed, I wrote to blackhole, and he gave me the right to post this topic
if you need proof, tell me and I will make screenshots of the correspondence
2 Likes
oh sorry I didn’t know that.(o__o’).
All Sourced from Bing. This is how you screenshot. You can use save as for GIFS.
These are screenshot and record video guides for most major operating systems.
To take a screenshot on a MacBook, you can use the following keyboard shortcuts
- To take a screenshot of the entire screen, press Shift + Command + 3.
- To take a screenshot of a particular portion of your Mac screen, press Shift + Command + 4.
- To capture an application window, press Shift + Command + 4, then press the Space bar. The pointer will change to a camera icon, and you can click on the window you want to capture.
To take a screenshot on an iPad, you can use the following methods
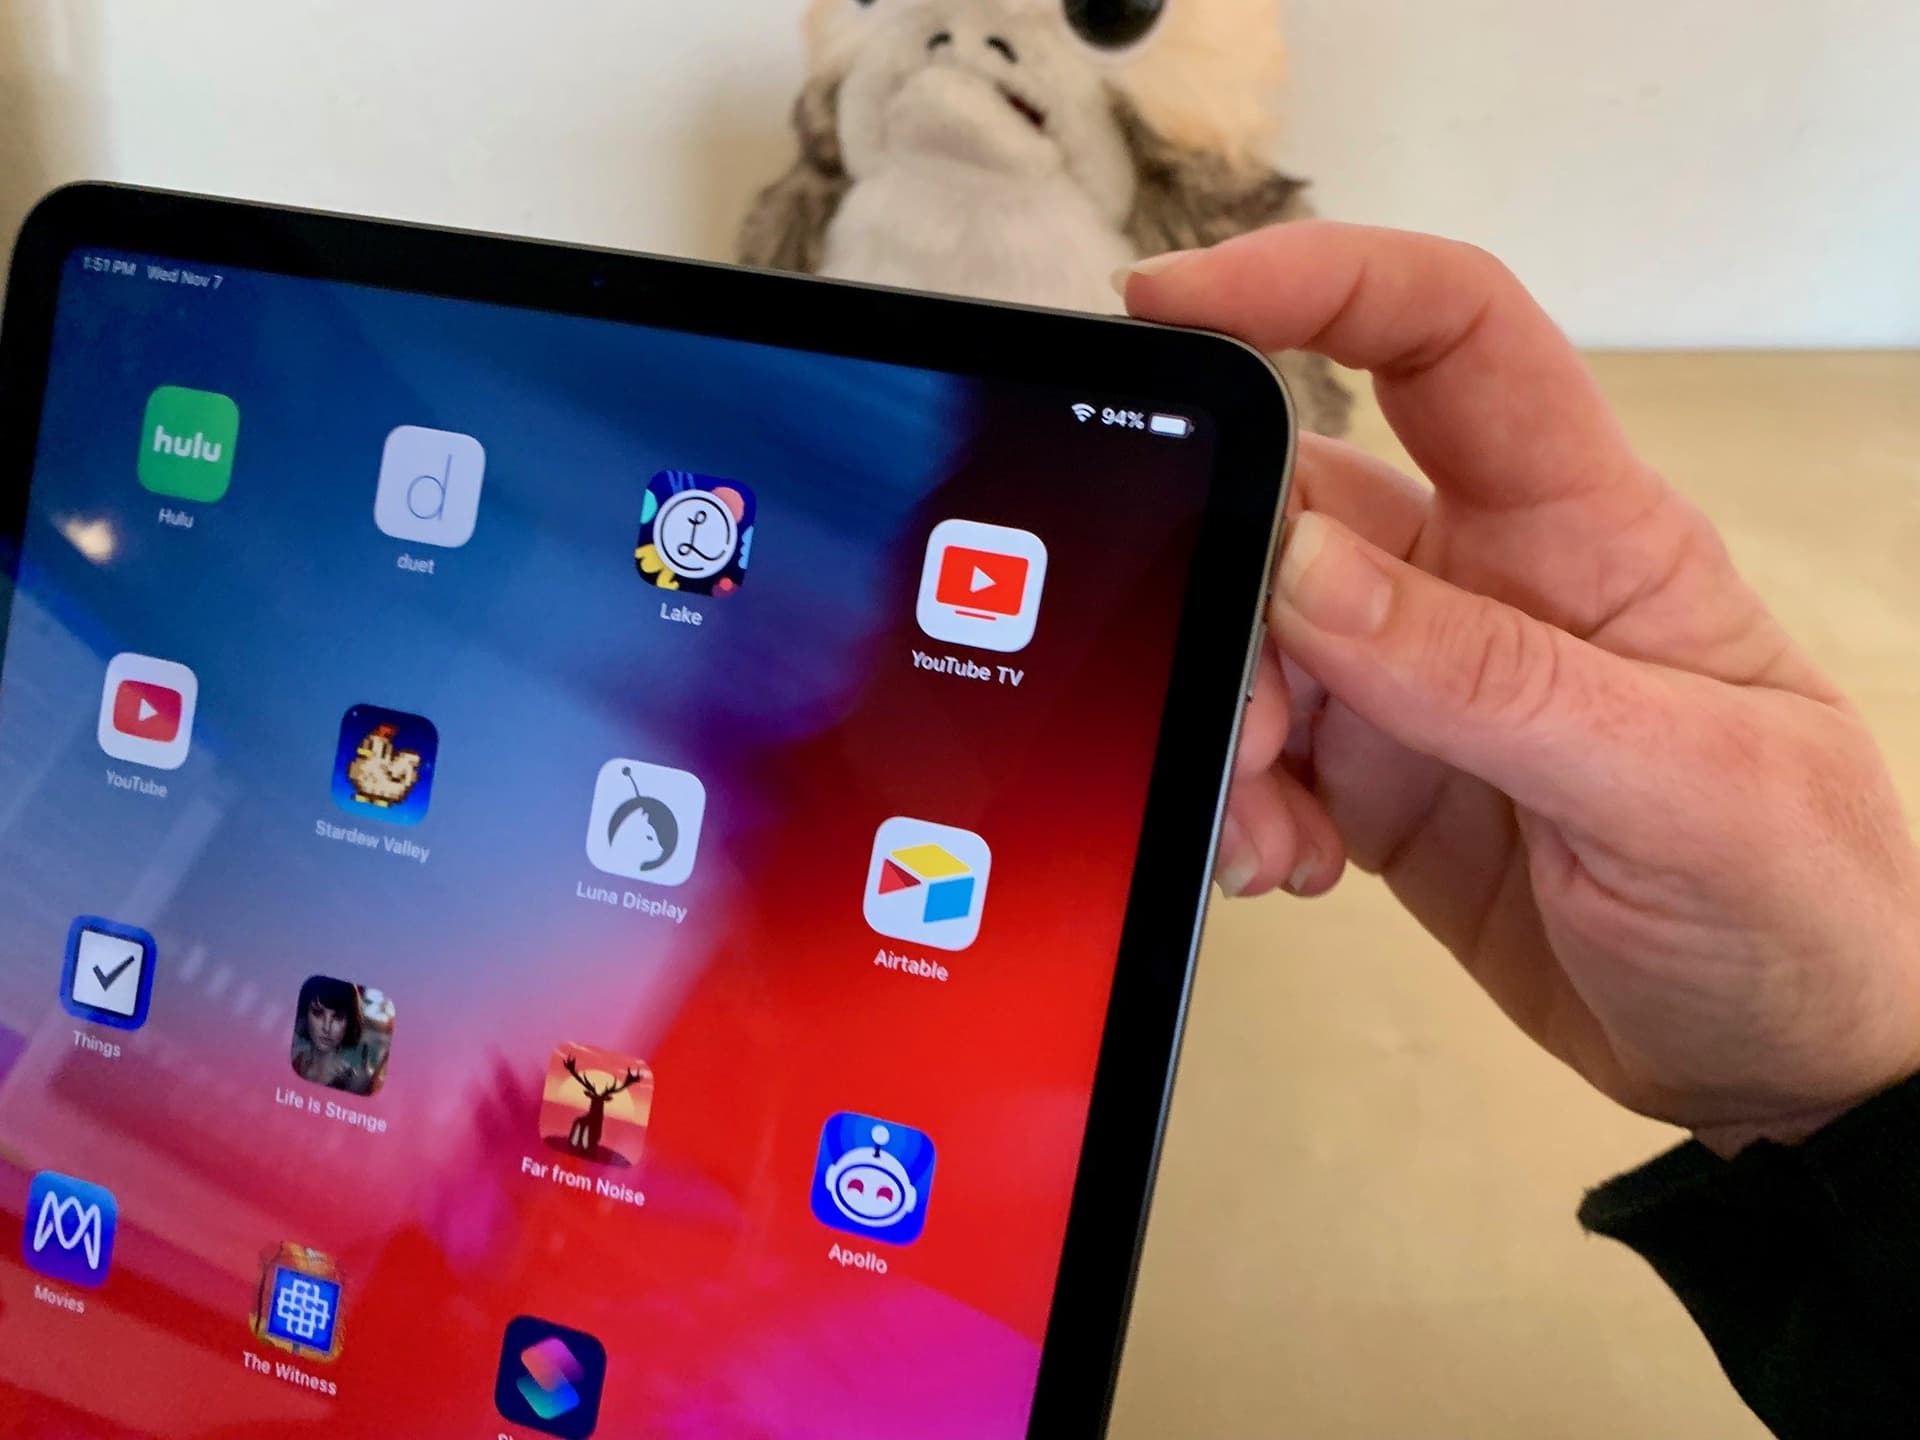
- Press the Power button and Volume button (or Home button) at the same time.
- Release both buttons quickly.
- A thumbnail of the screenshot will appear temporarily on your screen. Tap the thumbnail to open it or swipe left to dismiss it.
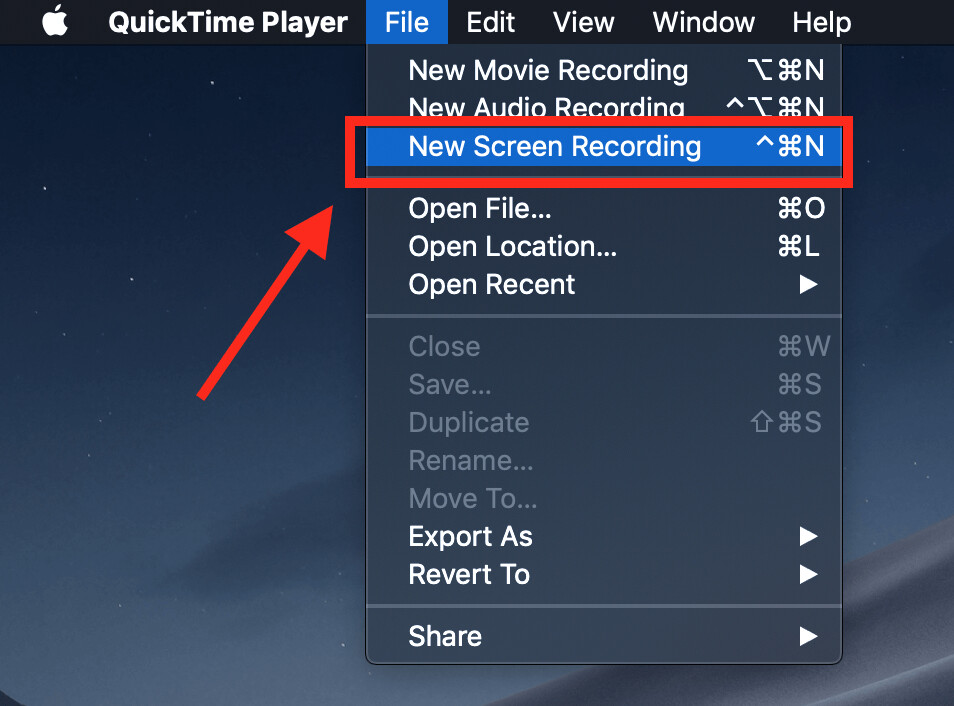
To record a video on your Mac, you can use the following methods:
QuickTime Player: Open QuickTime Player, go to “File” > “New Movie Recording”, and click the red record button to start recording.
Photo Booth: Open Photo Booth, click the “Record” button to switch to recording mode, and then click the red “Camera” button to start recording.
Third-party apps: Use apps like OBS Studio, Camtasia, or ScreenFlow for advanced recording features.
To record video on your iPad, follow these steps:
- Open the Camera app.
- Switch to video mode.
- Press the record button to start recording.
- Tap the stop button to end the video.
- The recorded video will be saved to your device’s Photo Library.
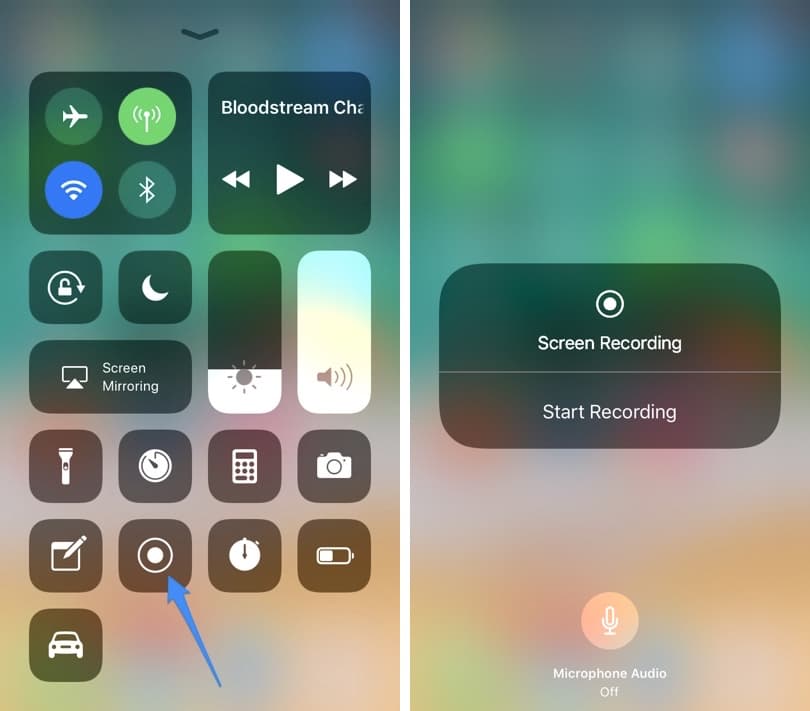
NOTE: For screen capture:
You can record your iPad screen by opening the Control Center and tapping the Screen Recording shortcut.
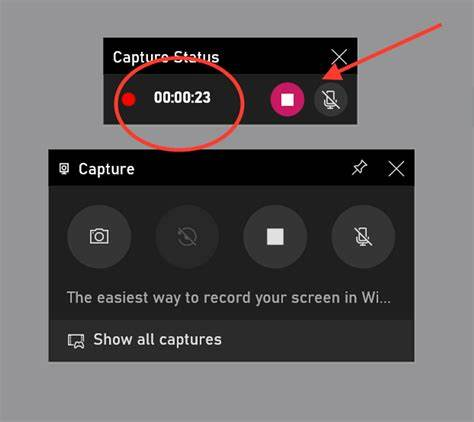
To take a screenshot on Windows, you can use the following methods:

- Press ALT+Print Screen to capture the active window.
- Press Print Screen (PrtSc) to capture the whole screen.
- Use the Snipping Tool, Snip & Sketch (Windows + Shift + S), or Game Bar (Windows + G) for more options.
- Screenshots are stored in the Pictures > Screenshots folder by default.
To record video on Windows, you can use the following methods:
Use the Windows Camera app with your webcam to record video straight to your PC.
Record gameplay on your PC using the Windows Game Bar. Access it while gaming by pressing the Windows key + G and selecting “Record.”
Record your PC’s screen using an online screen capture tool.
Open Snipping Tool, click the Record button in the top toolbar, then press New. Click to drag and drop a rectangle indicating the portion of the screen you would like to record. Press Start and you will see a 3-second countdown begin for your recording. After you finish, press Stop.
Open an app and then press the Windows + G keys on your keyboard. Then click the Record button in the Capture window to start recording. Finally, click the Stop button to end the recording and the Windows + G keys to view your video.

To take a screenshot in Linux, you can use the following methods
- Press the Print Screen (PrtSc) key to capture the entire screen.
- Use shortcut keys like Alt+PrtSc or Shift+PrtSc for specific areas.
- Install third-party tools like Flameshot or Kazam for more options.
- In GNOME, hit PrtSc to display a screenshot dialog, or use GIMP for additional features.
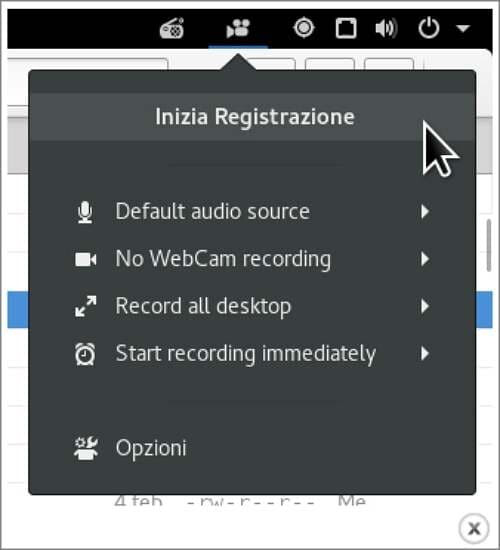
To record video on Linux, you can use the following methods:
Press “Ctrl + Alt + Shift + R” in Ubuntu to bring up the screen-recording pop-up window. Choose whether to record the full screen, a particular window, or a partial area.
Press “PrntScr” and switch to the Screencast tool, or use the “Ctrl + Shift + Alt + R” shortcut. You can record the selected area or the entire screen, and choose to include the pointer or not.
Press the Print key or use the screenshot button in the system menu, then switch to screencast mode. You can choose to include the pointer and select either a specific area or the entire screen.
Android:
Take a screenshot
- Open the screen that you want to capture.
- Depending on your phone: Press the Power and Volume down buttons at the same time. If that doesn’t work, press and hold the Power button for a few seconds. Then tap Screenshot. …
- At the bottom left, you’ll find a preview of your screenshot. On some phones, at the top of the screen, you’ll find Screenshot capture .
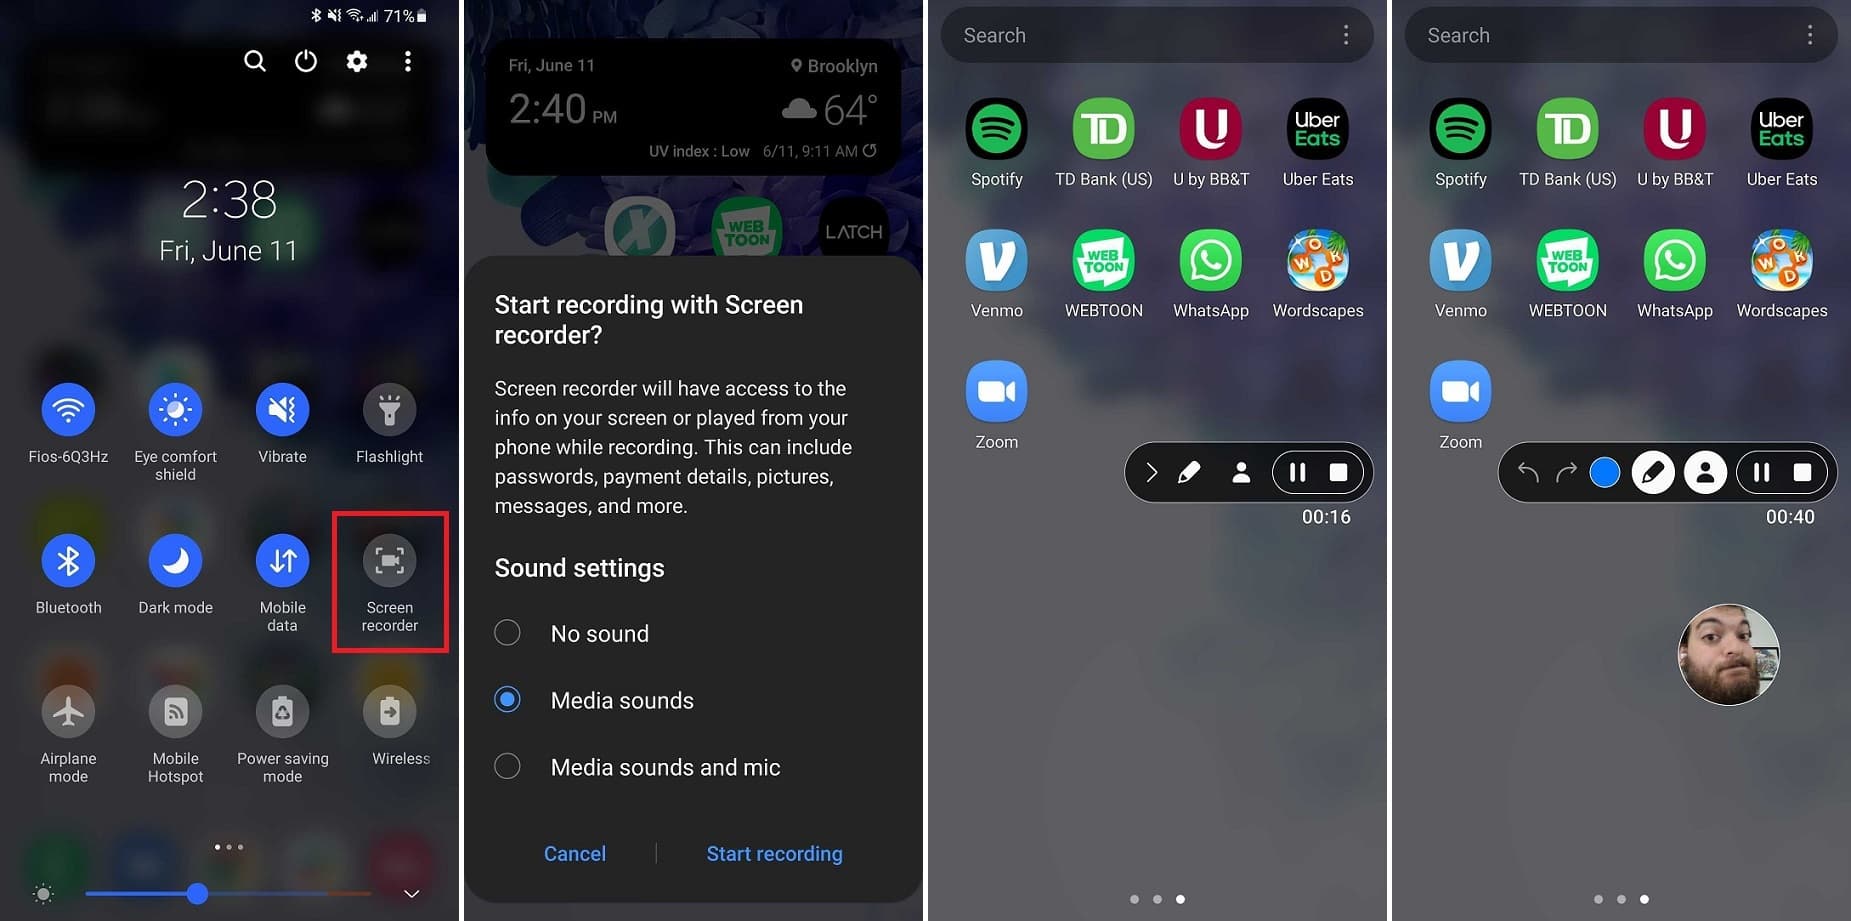
To record a video on Android, follow these steps:
Swipe down from the top of your screen with two fingers to expand the Quick Settings panel.
Tap Screen recorder.
Choose whether to record with sound and use gesture indicators.
Then tap Start or Start recording. Alternatively, you can download a third-party screen recorder app from the Google Play Store.
This covers the following operating systems:
- Mac OS
- iPad / iPhone
- Android
- Windows
- Linux (most distros)
This can apply to any device maybe
But it’s best you use a site like Video to animated GIF converter (ezgif.com) to do the work for you.
All information from Bing.
All Pictures from various sites.
16 Likes
wow dat’s alot of word.(o—o)
1 Like
Adding pictures to this
but anyway great guide reply. Thing. =|
1 Like
Just finished the pictures.
Also Step 1 and 2 can be skipped on chromebooks by pressing Shift + Ctrl + Show windows . If your external keyboard doesn’t have a Show windows key, press Ctrl + Shift + F5.
ya great!!! But I’m on computer so I didn’t need the extras.
1 Like
thx me love keyboard shortcuts!!!
1 Like
Yo just saying, If you are going to make a long reply like this can you use the hide details feature like this
Hide details
2 Likes
not bad, but a lot of useless information in my opinion, I will of course add you even to credits, thanks for the help, but let’s say regular videos can’t be sent to the form, only gifs
3 Likes
After making the regular video, a gif converter like the one above can be used to convert a gif for the forum.
3 Likes
For this reason, with the consent of @Monoreuk, I feel like this should be a wiki, for longevity and community editing (with permission, that is)
1 Like
disagree
no need for a wiki, this is just a basic guide to make gifs. It’s really not that difficult to do this. All you need to do is research how, then publish your information and steps on how onto the forums.
Plus monoreuk said he is adding the other devices, so there’s no need for a wiki in my opinion.
8 Likes
Well then I guess we could agree to disagree, for each has both pr0s and cons…
2 Likes
I mean community wikis are usually big projects that are constantly changing. As far as I know screen videos haven’t changed in years
4 Likes
Good for you I hoped for that!
1 Like